Irresistible 6-Inch Cheesecake: Recipes & Tips!
Imagine sinking your fork into a velvety slice of 6-inch cheesecake, where every bite feels like a warm embrace from your favorite dessert. Have you ever wondered how to achieve that perfect balance of creamy and crumbly without being buried under leftovers? You’re in the right place!
In this post, I’ll share my cherished tips and tricks for crafting an irresistible 6-inch cheesecake that will not only be a showstopper but is also perfect for small gatherings. From mastering the crust to exploring delightful flavor infusions, we’ll ensure your cheesecake journey ends in sweet success. Get ready to uncover the magic behind this timeless classic!
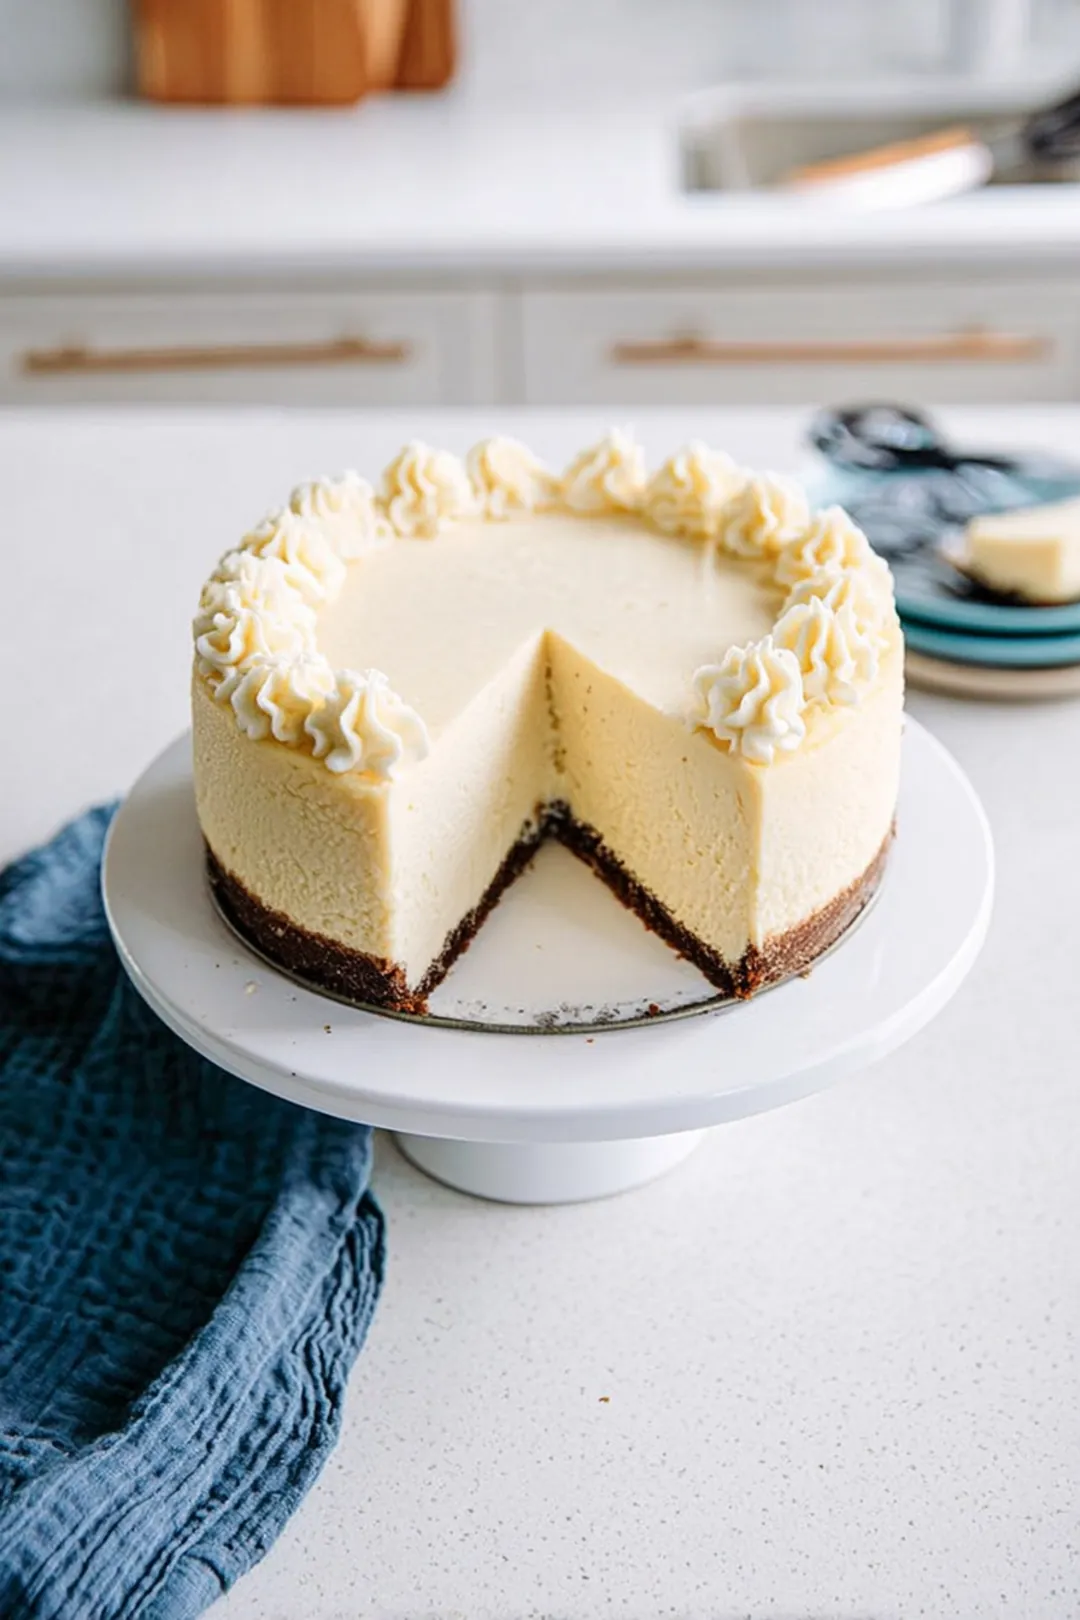
Table of Contents
Why You’ll Love This Recipe
Let’s face it: cheesecake is a classic dessert that effortlessly charms its way into any gathering. But when it comes to a 6-inch cheesecake, you’re hitting the sweet spot—serious flavor without overwhelming amounts of leftovers. Here’s what you absolutely need to keep in mind to make your cheesecake experience a masterpiece.
- Cream Cheese Temperature: Start with softened cream cheese. It’s important not just to have it at room temperature, but softened enough that it feels like a plush pillow. This is crucial for achieving a smooth, luscious filling. In my kitchen, I usually take the cream cheese out about an hour before I begin. If you’re short on time, gently heating it for about 10 seconds in the microwave can help speed up the softening process.
- Mixing Technique: Mix your batter on low speed. It’s tempting to ramp it up, but slow and steady prevents air bubbles from forming. This means you’ll have a denser, creamier cake that won’t crack while baking.
- Crust Consideration: For a buttery graham cracker crust, don’t skip melting the butter—it makes all the difference in achieving that perfect crispy, crumbly texture. Plus, adding a sprinkle of sugar to the crust enhances the flavor depth. I find that a tablespoon of brown sugar adds a lovely touch of caramel flavor to the crust.
- Chill Time: Patience is your secret weapon. Allow your cheesecake to cool completely before chilling it in the fridge for at least four hours—or even better, overnight. This resting time permits the flavors to meld beautifully and elevates the texture to sublime levels.
- Flavor Infusions: Thinking about mixing things up? Try adding lemon zest or vanilla bean to your batter for a refreshing twist or a hint of luxury. Feel free to explore other flavor additions—each can elevate your classic cheesecake into a modern masterpiece.
- Serving Suggestions: A 6-inch cheesecake is perfect for more intimate gatherings. Top your creation with fresh fruits, a dollop of whipped cream, or a drizzle of rich chocolate sauce to bring a little splash of elegance to your presentation.
- Mistakes to Avoid: Keep a close eye on the baking time! Overbaking is the biggest culprit for a dry cheesecake. Pull it out when the center is still slightly jiggly; it will continue to set as it cools.
Now that you’re equipped with these essential tips, let’s dive into the steps to create your irresistible 6-inch cheesecake masterpiece!
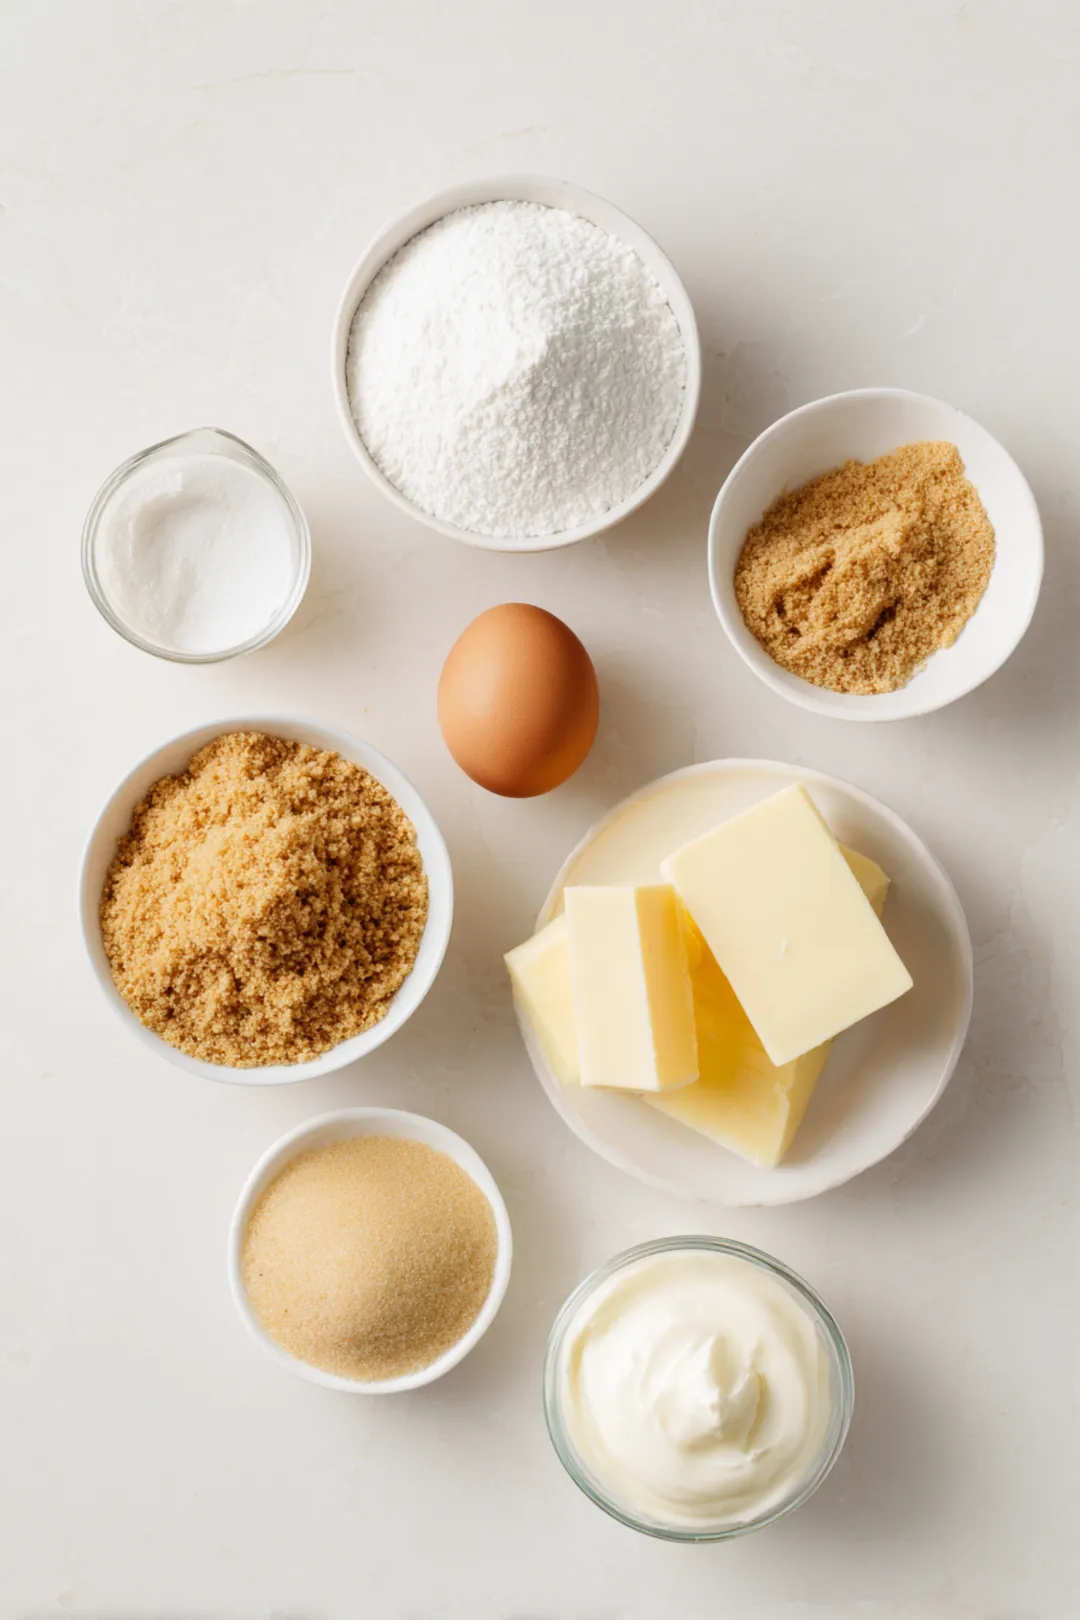
Essential Ingredients for Your 6-Inch Cheesecake
Creating a fantastic 6-inch cheesecake is all about selecting the right ingredients. Over the years, I’ve learned that the quality of your components can truly make or break your dessert. Let’s unpack what you need!
Cream Cheese
At the heart of any cheesecake is good-quality cream cheese. Don’t compromise—this isn’t the place for substitutes. Look for brands that use minimal ingredients and deliver a rich, tangy taste that’s hard to replicate.
To ensure your cream cheese is at the perfect temperature, remove it from the fridge at least an hour before you begin. Softening the cream cheese is critical because it creates that smooth, fluffy texture we all crave. To check if it’s soft enough, press it gently with your finger. If it gives easily and leaves an indentation, you’re ready to mix.
Sweeteners
Now, let’s talk sweeteners. Traditional granulated sugar does a marvelous job, but don’t overlook powdered sugar, which provides a different, wonderfully smooth sweetness. If you’re feeling adventurous, consider experimenting with honey or maple syrup. These natural sweeteners can introduce a complex flavor profile without compromising the texture. Just remember to adjust your ratios, as these liquid sweeteners can be denser!
Crust Components
Ah, the crust! While a classic graham cracker crust is a tried-and-true favorite, why not indulge a little with Oreos? Seriously, they lend an indulgent touch that can elevate your cheesecake to new heights. If you want to create something truly unique, consider adding crushed nuts or a sprinkle of cinnamon or nutmeg to your crust for depth and a warm flavor twist.
Flavorings
The fun part! Flavorings are where you can really make this cheesecake your own. Vanilla extract is essential, of course, but how about incorporating citrus zest for a bright burst or even a swirl of melted chocolate for a decadent depth? In my experience, using high-quality vanilla bean paste instead of extract can elevate the flavor. Also, adding fresh fruits like strawberries or blueberries into the batter can amplify sweetness and bring vibrant colors to your cheesecake masterpiece.
Step-by-Step Recipe Guide
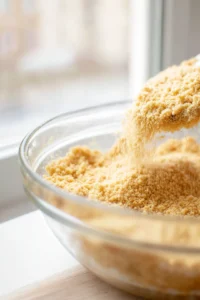
Preparing the Crust
- Crush the Base: If you’re using graham crackers (or Oreos), the easiest method is to pulse them in a food processor until they resemble fine crumbs. You want a texture that binds beautifully without being too sandy.
- Mixing It Up: Combine your crumb mixture with melted butter and a touch of sugar. Ensure everything is fully integrated—it’s the secret to a tasty, cohesive crust.
- Pre-bake for Perfection: For that wonderful, crisp texture, don’t skip the pre-baking step! About 8 to 10 minutes in a preheated 350°F (175°C) oven works wonders.
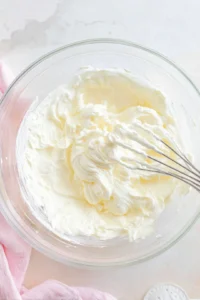
Crafting the Batter
- Mixing Creaminess: In a large mixing bowl, beat together the softened cream cheese and sugar until you achieve a creamy, lump-free consistency. This step ensures that everything blends beautifully and effectively.
- One Egg at a Time: Add in your eggs, one by one, mixing just enough to incorporate each before adding the next. This technique is critical for creating a light and fluffy texture without overworking the batter.
- Flavoring with Tender Care: When adding your flavorings, fold them in gently. This helps keep air in the batter, contributing to that heavenly lightness we all adore.
Baking the Cheesecake
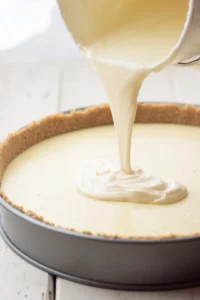
- Pour with Care: Carefully pour your batter into the prepared crust, taking care not to disturb the crust as you do so. A little patience at this stage goes a long way!
- Water Bath Wonder: A water bath isn’t just reserved for fancy bakers; it’s a worthy technique that helps prevent cracking. Wrap your springform pan in aluminum foil and place it inside a larger pan filled with hot water—this method ensures even baking and keeps your cheesecake beautifully moist.
- Jiggle Test: When baking is complete, perform the jiggle test. The edges should be set while the center remains slightly wobbly, indicating that it’s done but still in need of a cooling period.
Chilling and Serving
- Cooling Down: After baking, let the cheesecake cool gradually at room temperature to help prevent cracks as it transitions from hot to cold.
- Chill Time: Aim for at least 4 hours of chilling, but if you can spare overnight, your taste buds will thank you! The flavors meld beautifully during this time.
- Serving Style: When it comes to serving, think about garnishing with a luscious fruit compote or a light dusting of cocoa powder. A simple touch enhances both the presentation and flavor profile.
Mistakes to Avoid for Cheesecake Perfection
Overbaking
One of the most common pitfalls is overbaking. Signs include a dry surface and a dull appearance. Keeping close tabs on the clock and doing the jiggle test will help prevent this!
Not Chilling Enough
Chilling isn’t just a step; it’s essential for a smooth texture and concentrated flavors. A well-chilled cheesecake is the definition of bliss.
Incorrect Ingredient Ratios
Baking is a science! Be precise with your measurements. A small error can drastically change the texture and flavor, and you definitely don’t want to end up with a custardy mess!
Skipping the Water Bath
Skipping the water bath can lead to those dreaded cracks we want to avoid. Go ahead and set it up even if you’re a novice. It’s simpler than it sounds!
Flavor Customization Ideas
Seasonal Variations
Take inspiration from the seasons! Try a cozy pumpkin spice cheesecake in the fall or a refreshing no-bake strawberry cheesecake for summer. These variations can keep your dessert repertoire exciting!
Dietary Alternatives
If you’re accommodating dietary needs, consider a vegan cheesecake using cashew cream and a gluten-free crust. It’s both delicious and inclusive for everyone!
Expansion of Flavors
Think outside the box! Infuse unique flavors like matcha for a tea lovers’ delight or espresso for a decadent coffee kick. Each flavor can be paired with corresponding toppings—think chocolate shavings for espresso or a light berry compote for matcha.
Serving Size and Storage Tips
How Many Does a 6-Inch Cheesecake Serve?
A 6-inch cheesecake typically serves about 4 to 6 people, making it perfect for intimate gatherings or a sweet date night. Don’t forget, smaller desserts can pack a mighty punch!
Storing Leftovers
To store any leftovers, wrap the cheesecake tightly in plastic wrap to maintain its freshness. For longer storage, freeze slices individually—this way, you can enjoy a slice at any time while keeping the texture just right.
Additional Resources and References
Helpful Tools
A quality springform pan is essential for easy removal of your cheesecake. An instant-read thermometer is also a fantastic investment—it helps ensure your cheesecake is perfectly baked.
Authoritative Sources
For nutritional guidelines, I recommend checking with the USDA. Staying informed helps us make the best choices in the kitchen.
Further Reading
Explore more recipes and techniques to keep your cheesecakes exciting and fresh. For example, if you’re looking for tasty snacks to serve alongside your cheesecake, check out Air Fryer Grinder Sandwich or try the popular TikTok grinder sandwich.
Happy baking, friends! Remember, each cheesecake is a new adventure, so enjoy both the process and the sweet rewards that follow.
FAQ
How many people will a 6-inch cheesecake feed?
A 6-inch cheesecake typically serves about 4 to 6 people, depending on portion size. It’s perfect for small gatherings or as a rich dessert option for a few friends.
What is the standard size of a cheesecake?
The most common cheesecake size is 9 inches in diameter, serving around 12 slices. A 6-inch cheesecake is an ideal choice for smaller celebrations or intimate dinners.
What is the most common size cheesecake?
The most common cheesecake size is the 9-inch version, often used for larger gatherings. A 6-inch cheesecake, however, is a great alternative for those who prefer a smaller, more manageable dessert.
Can I make a no-bake cheesecake in a 6-inch pan?
Absolutely! A no-bake cheesecake can be made in a 6-inch pan. This size is perfect for achieving a creamy texture while maintaining a balanced proportion of filling and crust.
What are some tips for baking a 6-inch cheesecake?
To ensure a successful 6-inch cheesecake, utilize room temperature ingredients, avoid overmixing, and bake in a water bath to prevent cracks. Letting it cool properly also helps maintain its texture.
Conclusion
Making a 6-inch cheesecake is a delightful journey rooted in using high-quality ingredients and mastering key techniques. Remember, softening that cream cheese is essential for achieving that coveted creamy texture. Don’t shy away from experimenting with sweeteners, crusts, and flavors—each adjustment offers a chance to elevate your dessert. Be mindful of common pitfalls like overbaking and neglecting the chilling process; the right approach will reward you with a cheesecake that’s both stunning and scrumptious. So, whether you’re whipping this up for a cozy dinner or a gathering with friends, let your creativity shine! Happy baking, and may your cheesecakes always be delightfully fluffy and bursting with flavor!

Irresistible 6-Inch Cheesecake: Recipes & Tips!
Ingredients
Method
- Preheat your oven to 325°F (160°C). To prepare the crust, mix the graham cracker crumbs, sugar, and melted butter in a bowl until well combined. Press this mixture firmly into the bottom of a 6-inch springform pan to form an even layer.
- In another bowl, beat the softened cream cheese until smooth. Add the sugar and vanilla extract, mixing until creamy. Incorporate the egg and sour cream, mixing just until combined. Be careful not to overmix.
- Pour the cream cheese filling over the prepared crust and smooth the top. Bake for 55-60 minutes, or until the center is set but still slightly jiggly. Let the cheesecake cool before refrigerating for at least 4 hours or overnight before serving.