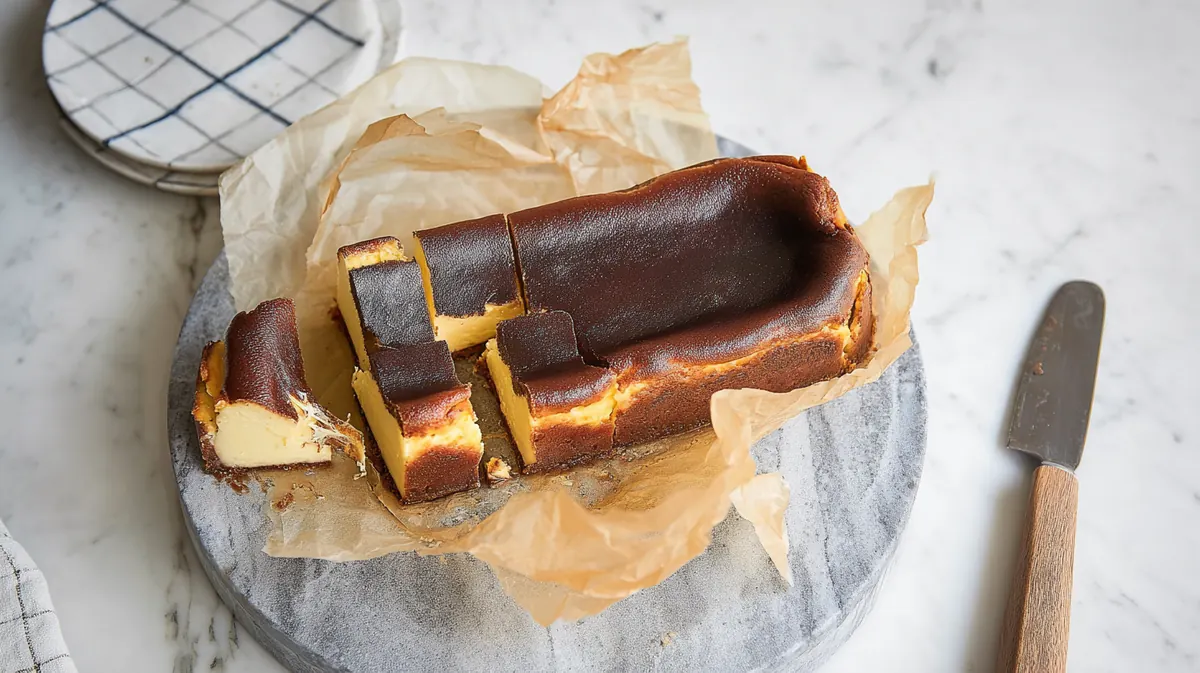
Delicious Air Fryer Burnt Basque Cheesecake for Two!
Can a cheesecake be both creamy and burnt at the same time? Absolutely! Welcome to the delectable realm of Air Fryer Burnt Basque Cheesecake, where a touch of char adds a delightful twist, particularly in this small-batch recipe crafted just for two. In this post, I’m excited to guide you through creating this uniquely scrumptious dessert that’s perfect for sharing—or savoring all on your own (no judgment here!). With my essential tips, you’ll learn how to nail that silky custardy center topped with a beautifully burnt crust. Let’s embark on this creamy adventure together!
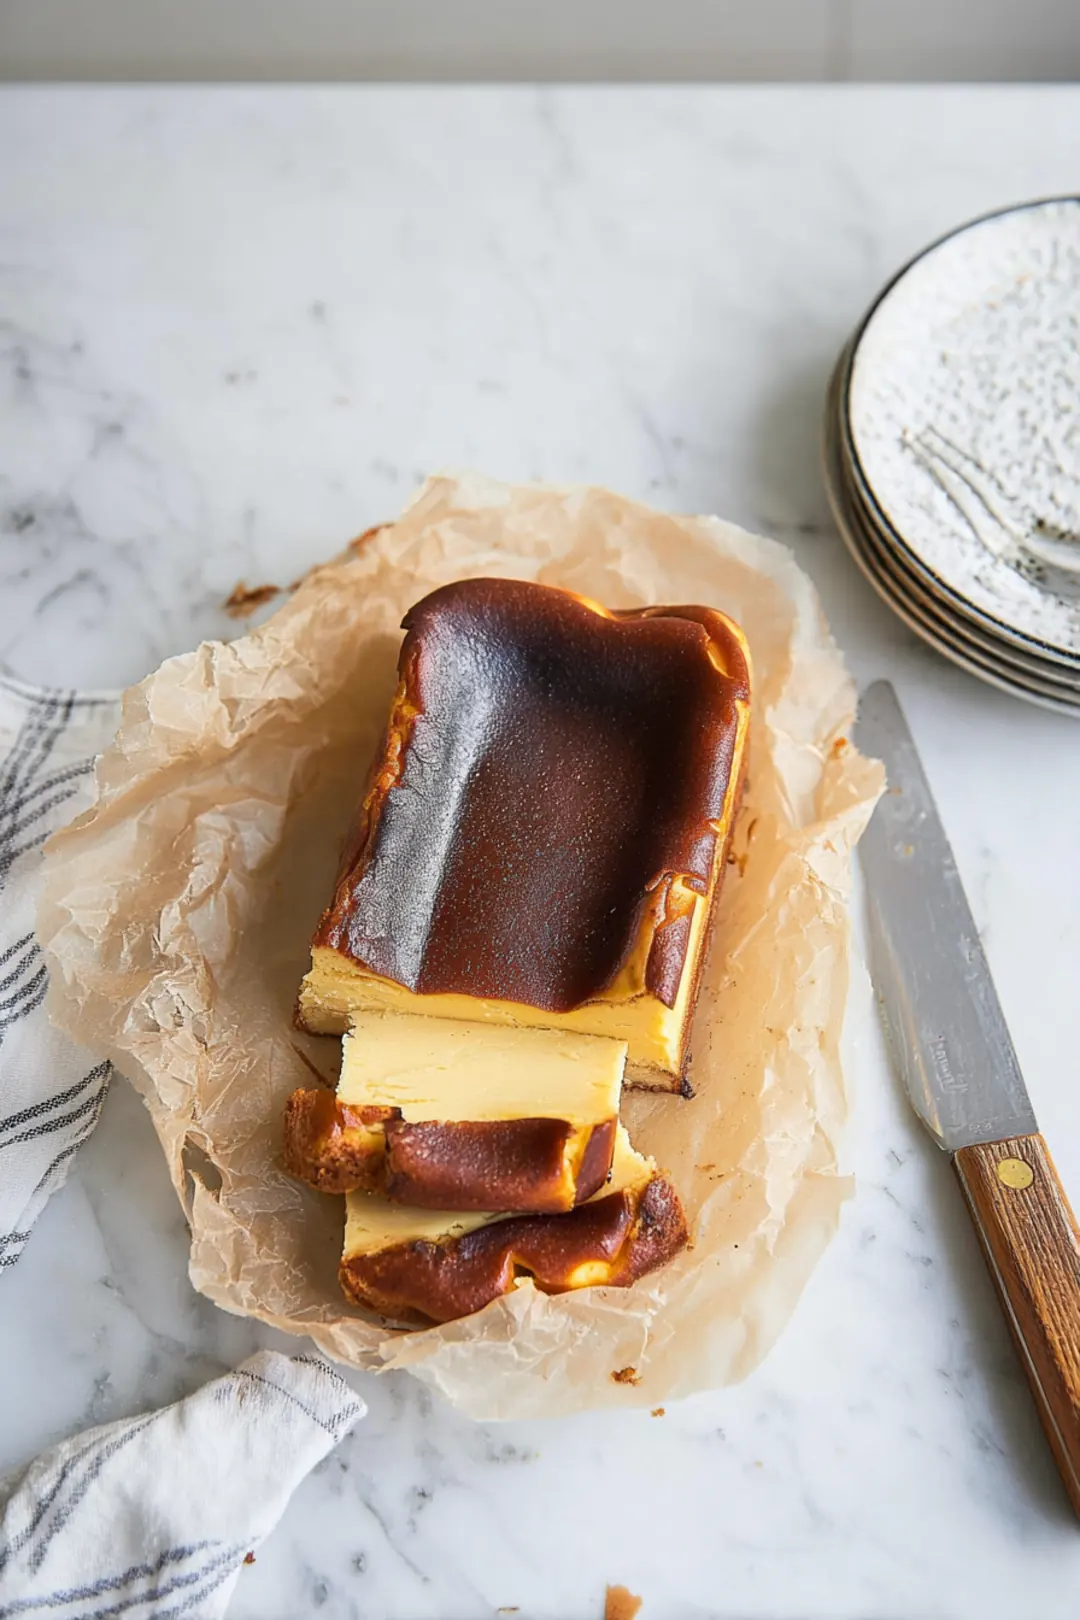
Table of Contents
Why You’ll Love This Recipe
This Air Fryer Burnt Basque Cheesecake is not only a charming twist on a classic dessert, but it’s also simple and rewarding. Here are some delightful reasons that will elevate your cheesecake game and ensure it comes out delicious every time.
-
Preheat for Perfection: Preheating your air fryer for at least 5 minutes is key. This simple step creates that dreamy, custardy center while providing a perfectly burnt exterior. I always set a timer to remind myself; it’s an essential task I never skip in my kitchen.
-
Use Room Temperature Ingredients: For a smoother batter that yields that velvety texture, bring your cream cheese and eggs to room temperature. This also facilitates easier mixing! I usually set them out an hour ahead for that perfect mellow warmth.
-
Brown Sugar Bliss: By substituting regular sugar with brown sugar, not only do you amplify the flavor with an added hint of molasses, but you also introduce moisture into your cheesecake. If you’re feeling adventurous, consider experimenting with muscovado sugar for a more complex taste.
-
Watch Your Cooking Time: Since air fryers can vary widely, keep a close eye on your cheesecake as it cooks. Look for it to puff up and develop a lightly caramelized top, while still remaining jiggly in the middle—this is the magic formula for that ideal creamy center. Check it a few minutes before the recommended cooking time for perfect results. The edges should be set, but that little jiggle in the middle is a sign of success.
-
Chill for Greatness: Patience is a virtue when it comes to cheesecake! Allow it to rest in the fridge for a minimum of four hours (overnight is even better) to help solidify its texture and deepen the flavors. Trust me; the wait will be worth it!
-
Gluten-Free and Vegan Variations: Want a gluten-free option? Simply swap regular graham cracker crumbs with gluten-free alternatives. For those seeking a non-dairy version, coconut cream makes an excellent substitute, providing a lovely flavor that surprises many.
-
Serving Suggestions: Top your cheesecake with a simple berry compote or finish it off with a sprinkle of sea salt. These add-ons create the perfect balance to the rich sweetness, making each bite an absolute delight!
Ingredient Benefits
Why This Recipe Works
One of the beautiful aspects of Air Fryer Burnt Basque Cheesecake lies in both its indulgent texture and the health benefits of its ingredients. For example, heavy cream not only contributes a rich texture but also provides your body with essential fats necessary for the absorption of fat-soluble vitamins. Remember that balance is key!
A particularly noteworthy ingredient is cream cheese, which is rich in calcium and a source of protein. As highlighted by the Mayo Clinic, “Calcium plays a crucial role in maintaining bone health and can help prevent osteoporosis.” When enjoyed in moderation, this creamy delight can contribute positively to your nutrient intake while satisfying your cravings.
Step-by-Step Preparation
Mixing the Batter
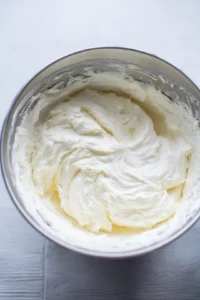
There’s nothing quite like the symphony of your mixer whirling as the ingredients come together! Combining ingredients is where the magic begins. Start by beating your room temperature cream cheese until it’s exquisitely smooth. A friendly tip from my kitchen: gradually add the sugar to avoid any lumpy surprises in your batter.

Once your mixture is silky, it’s time for adding flavor. Whisk in heavy cream along with any optional flavorings like vanilla extract or fresh lemon zest. Feeling adventurous? This is your green light to stir in cocoa powder for a decadent chocolate variation. Imagine those luscious flavors melding together!
Prepping the Air Fryer
Before cooking, we must preheat the air fryer. Set it to 320°F (160°C) for about five minutes. This critical step ensures we achieve that coveted caramelized top that makes Basque cheesecake so irresistible.
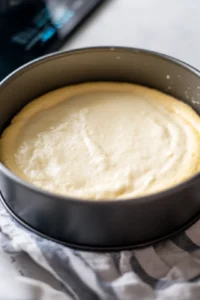
For choosing the right bakeware, it’s essential that you use a snug-fitting pan to guarantee even cooking. A ceramic or metal dish works brilliantly in your air fryer basket. If your pan shakes or doesn’t feel secure, you could end up with burnt edges and an unset center. Personally, I love using a springform pan for effortless release and perfect shape.
Cooking Your Cheesecake
Air Frying Process
Now, onto the fun part—setting the temperature and time. Carefully place the cheesecake in your air fryer set at 320°F (160°C) for approximately 25-30 minutes. Keep in mind that air fryer models can vary, so stay observant during the process!
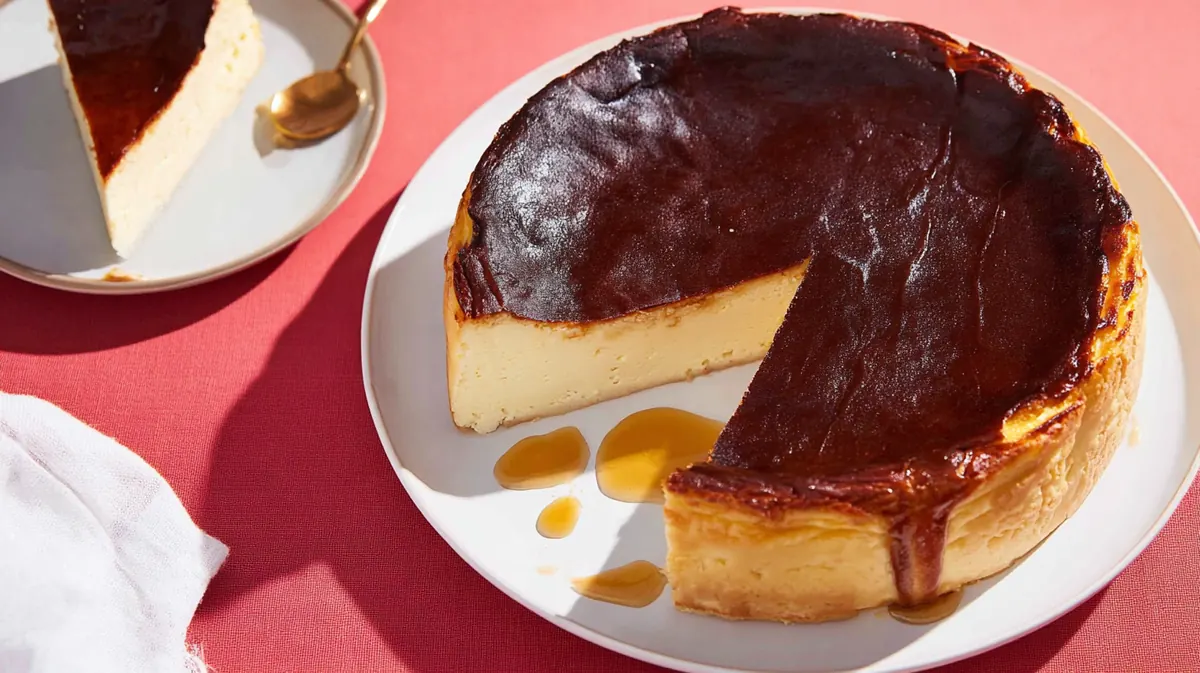
Checking for doneness takes a bit of finesse. Look for a lovely puffed top—golden brown and glossy—but don’t fear a little jiggle in the center! That gentle quiver hints that your cheesecake is both creamy and dreamy.
Troubleshooting Common Issues
Every kitchen has its quirks, and if you notice uneven baking during cooking, simply rotate the pan halfway through. This simple twist can make a world of difference in achieving delicious uniformity!
In terms of overcooking prevention, keep an eye on the color. Your cheesecake should have lightly browned edges with a still-jiggly center. That’s your cue: it’s time to remove it from the heat before it succumbs to a fate of dryness!
Cooling and Serving
Cooling Techniques
As they say, good things come to those who wait. Allow your cheesecake to chill in the fridge for a minimum of two hours, although letting it rest overnight is the holy grail of cheesecake bliss. This not only melds the flavors beautifully but also ensures an impeccable texture.
Storage tips are quite simple: keep any leftovers in an airtight container in the fridge for up to three days. If you’re in the mood for meal prep, you can freeze your cheesecake for future indulgence. Simply thaw it overnight in the fridge before digging in.
Serving Suggestions
To elevate your celebration of this masterpiece, think about enhancing your cheesecake. A vibrant berry compote or a cloud of freshly whipped cream can take it to the next level. And don’t forget that sprinkle of sea salt—it’s the secret weapon that enhances all the flavors beautifully.
When it comes to pairing beverages, I suggest a velvety cup of coffee or perhaps a luscious dessert wine. Each sip complements the rich depth of your cheesecake, turning a simple dessert into an elegant affair.
Creative Variations
Dietary Alternatives
Let’s not overlook inclusivity! If you’re after gluten-free options, swap out regular flour with almond flour or a gluten-free blend. This ensures everyone can enjoy the delightful experience of your cheesecake.
And for those in search of vegan and non-dairy substitutes, coconut cream or cashew cream works wonders instead of heavy cream. Many are pleasantly surprised at how delicious a non-dairy cheesecake can be—it’s a journey well worth embarking on!
Flavor Customizations
When it comes to experimenting with add-ins, the sky’s truly the limit! You can swirl in fruit purees or spices based on the season; think of adding warmth from cinnamon or something festive like pumpkin spice during the fall.
For seasonal variations, consider a fresh strawberry swirl in spring. Adjusting your cheesecake recipe according to the seasons not only showcases variety but also connects you more intimately with that season’s ingredients.
Tips for Success
Success in baking hinges on quality ingredients and tools. Investing in well-regarded brands elevates your results and leads to delightful cheesecake experiences in your kitchen!
FAQs
If you’re pondering about flavor variations
Feel free to experiment with mix-ins that cater to your cravings. The possibilities are truly endless!
How much time does it take
Typically, it takes around 25-30 minutes to perfect your Air Fryer Basque Cheesecake, but always keep a watchful eye. Your intuition will guide you!
Conclusion
Creating your own Air Fryer Burnt Basque Cheesecake is a joyous culinary adventure that beautifully merges health with indulgence. With the right balance of rich ingredients like cream cheese and heavy cream, not only do you satisfy your sweet tooth but also nourish your body. I encourage you to embrace the joy of experimentation—don’t hesitate to play with flavors, swap in alternatives, and elevate your cheesecake with distinctive toppings. Each bite celebrates your creativity and passion for good food. So preheat that air fryer, gather your ingredients, and let your kitchen transform into a haven of sweet aromas. After all, in the world of desserts, the ultimate recipe is to have fun and taste the love along the way! Happy baking!
Delicious Air Fryer Burnt Basque Cheesecake for Two!
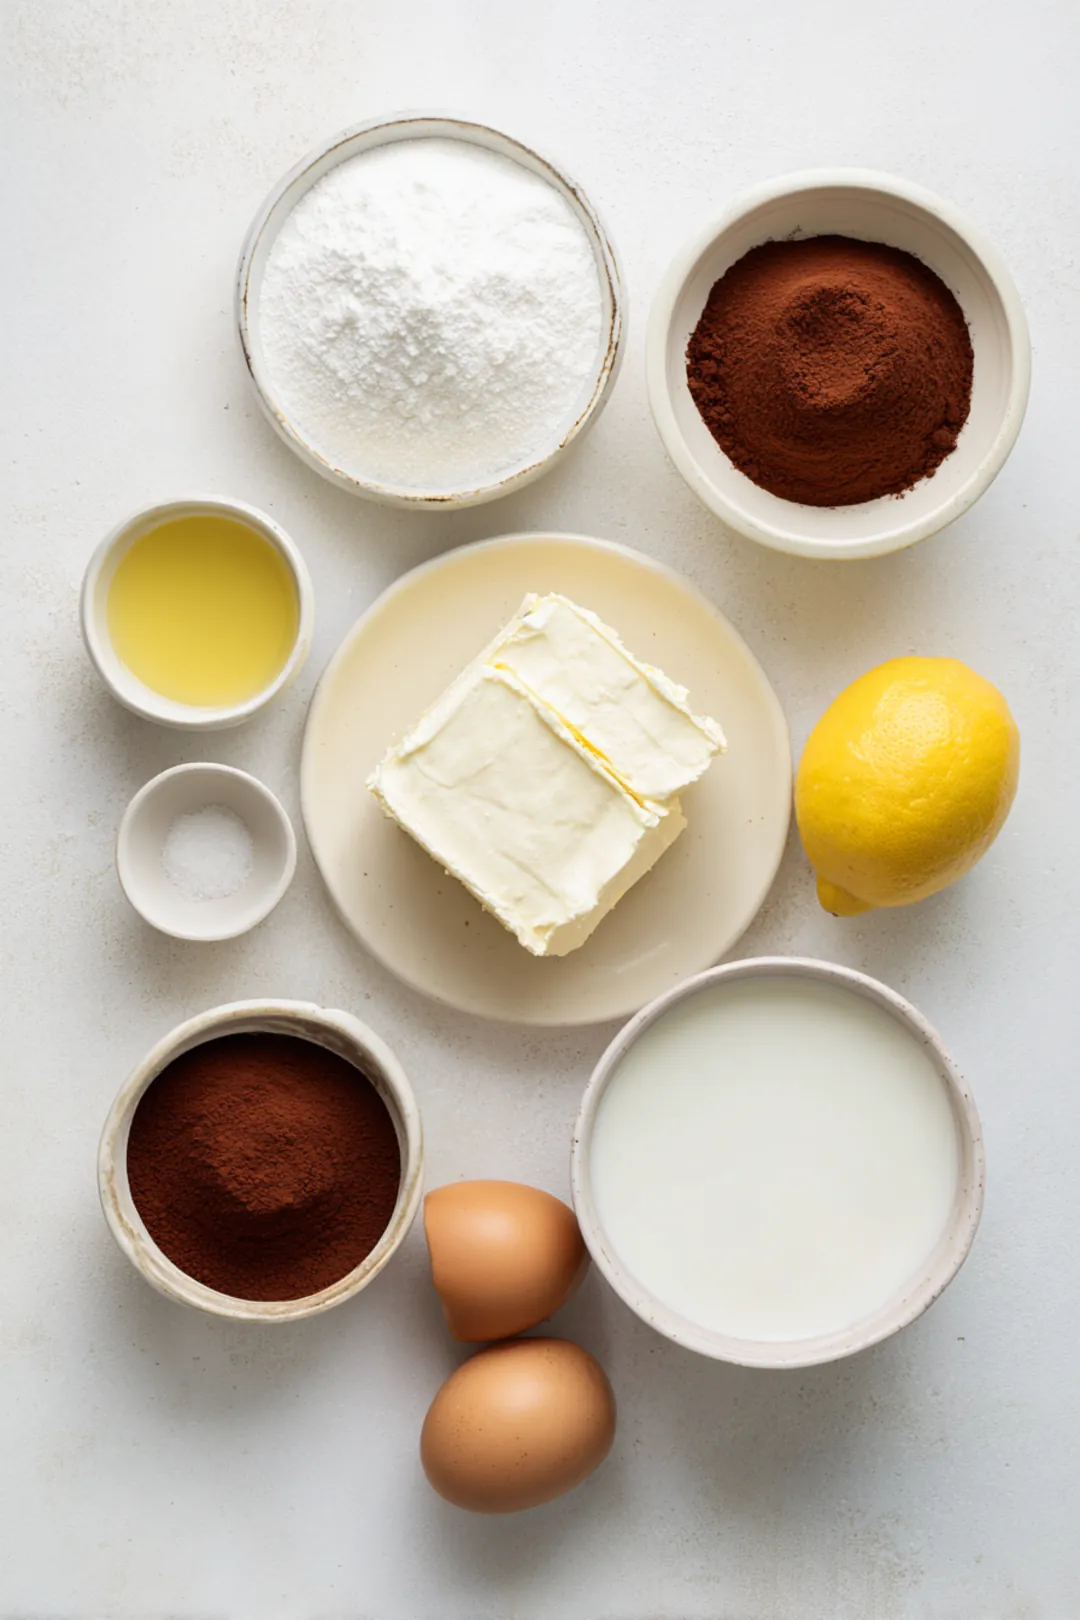
Ingredients
Method
- Preheat the air fryer to 320°F (160°C).
- In a mixing bowl, combine the softened cream cheese and sugar. Beat until smooth and creamy. Add the egg, heavy cream, and vanilla extract; mix until well combined.
- Pour the cheesecake batter into a greased baking dish and place it in the air fryer basket. Cook for 25-30 minutes until the top is browned and the center is slightly jiggly. Let it cool before refrigerating for at least 2 hours before serving.