Pro Tip: Proof Bread Dough Perfectly in Your Air Fryer
Ready to transform your air fryer into a bread-proofing powerhouse? Picture this: you sink your teeth into a warm, crusty loaf that you crafted effortlessly, thanks to a few clever hacks.
In this post, I’m diving deep into the delightful art of proofing bread dough using your air fryer—a game-changer for any avid bread lover. You’ll discover precise temperature settings, effective humidity tricks, and airflow strategies that turn your kitchen into a mini-bakery. Let’s get those yeast bubbles rising and bring the smell of freshly baked bread to your home!
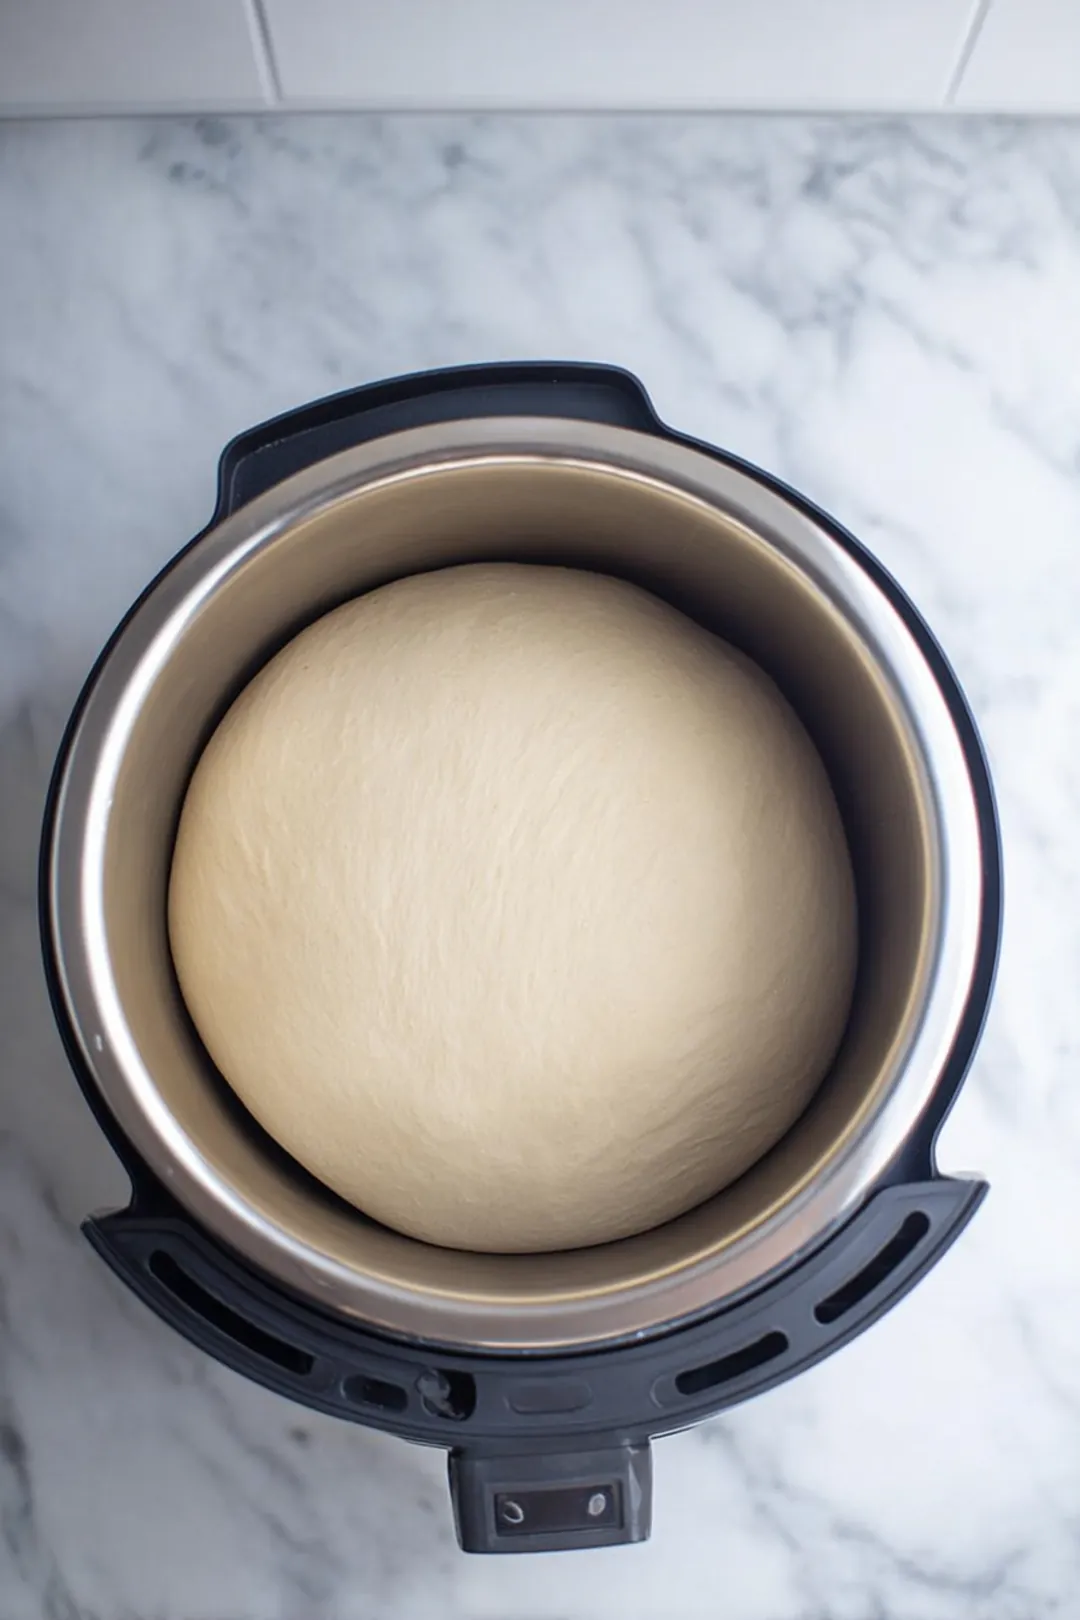
Table of Contents
Quick Tips
Ready to elevate your bread baking game? These tips will not only perfect your proofing process in an air fryer but also transform your kitchen into a bread lover’s paradise.
-
Temperature Control: Set your air fryer to a low temperature of around 80°F (27°C) for ideal proofing. This gentle warmth encourages yeast activity without cooking your dough. In my experience, if my air fryer maintains a steady temperature, my dough always turns out lighter and fluffier. It’s like giving your bread a cozy blanket to snuggle into!
-
Humidity Hack: Enhance your proofing environment by adding a small oven-safe bowl filled with water in the air fryer. This creates a humid atmosphere that helps your dough rise beautifully, mimicking a traditional proofing box. Here’s a quick tip: if the air fryer gets a little too warm, toss in a few ice cubes; they melt slowly and help keep that humidity just right!
-
Airflow Management: Avoid overcrowding your air fryer. Leave ample space around the dough for air to circulate; it’s crucial for consistent proofing and prevents unwanted condensation from forming.
-
Watch the Clock: Proofing times can vary based on dough type. Keep an eye on your masterpiece—most doughs will take roughly 30-40 minutes, but checking for a doubled size is your best gauge of readiness.
-
Flour Power: If your dough feels too sticky after proofing, lightly dust it with flour or use a silicone mat. This approach will ease handling and prevent stretching when shaping, allowing you to work your magic with confidence.
-
Experiment with Ingredients: Swap in different flours, like whole wheat, for a richer flavor or add in herbs for unique twists. Just remember that these variations can sometimes alter rise times slightly, so stay alert!
-
Make It a Masterpiece: Once proofed, preheat your air fryer before baking. This enables a fantastic crust while keeping the inside fluffy—just like the artisanal breads you crave!
Understanding Your Air Fryer for Proofing
Essential Features for Proofing
When it comes to proofing bread dough effectively, the right air fryer features are crucial. Look for units with temperature control; your air fryer should maintain a steady temperature around 80°F (27°C)—this is essential for activating the yeast. If your model includes a proof function, consider it a major win! It’s specifically tailored for this purpose and makes the entire process a breeze.
Capacity is just as key—an air fryer that’s too small can restrict airflow, leading to uneven proofing. You want enough space to allow your dough to rise comfortably without feeling cramped.
Best Air Fryers for Proofing Bread Dough
While a plethora of models promises the world, some stand out for proofing bread specifically. For instance, the Instant Vortex Air Fryer offers excellent capacity and precise temperature settings, while the Cosori Air Fryer, known for its versatility, is another fantastic option. Here’s a handy comparison of some popular models:
Air Fryer Model
Capacity (quartz)
Instant Vortex
6 qt
Cosori
5.8 qt
Ninja Foodi Deluxe
8 qt
Price (approx.)
$89
$99
$249
Notes
Great for families; reliable proofing
Multiple settings for versatility
Higher price but doubles as a pressure cooker
When selecting an air fryer, balance price vs. performance according to your baking ambitions. From my own baking journey, it’s always wise to invest in models that excel in proofing capabilities. The effort is well worth it when you reap the rewards of consistently delightful bread!
You might also find it helpful to explore some easy recipes. For instance, air fryer broccoli tots for picky eaters can be a hit for side dishes!
The Science of Proofing Bread Dough
Temperature and Yeast Activity
The ideal proofing temperature hovers around 80°F (27°C). This warmth is vital because yeast enjoys a cozy atmosphere to thrive. “Yeast is happiest between 75°F and 85°F,” notes the USDA. Ensuring your air fryer maintains this temperature is essential; too-cold environments can stifle fermentation, while excessive heat might kill the yeast entirely. Consistency is the name of the game—try to avoid frequently opening the fryer, as this disrupts the heat balance and ultimately affects your dough.
The Role of Humidity in Proofing
Humidity is crucial as well—yeast needs moisture to flourish. To create a cozy, humid environment, cover your dough with a damp cloth or place a small bowl of water inside the air fryer. This method helps maintain ideal moisture levels. A quick tip? Spritzing the air fryer’s interior lightly before proofing can further enhance that humid atmosphere your dough craves.
Step-by-Step Guide to Proofing Bread Dough in an Air Fryer
Preparing Your Dough
Start with a basic bread dough recipe, ideally using high-quality flour and fresh yeast. A thorough kneading session is paramount, activating the gluten that supports your dough’s rise. Here’s a little insider secret: the more you knead, the better! For a decent loaf, aim for at least 10 minutes of dedicated kneading—trust me, it really makes a significant difference!
Setting Up Your Air Fryer
To prepare your air fryer, adjust it to proof at 80°F (27°C) for 30 minutes. If your air fryer lacks a proof setting, simply use the lowest temperature available. Place your bowl of dough inside the fryer and don’t forget that all-important small bowl of warm water to create the humid environment—the yeast will express its gratitude through delicious bread! If your model has multiple racks, position the water bowl on a lower level for enhanced results.
Monitoring Proofing Progress
While your dough is proofing, keep a watchful eye on its progress. It should roughly double in size, typically taking around 30 minutes. If you’re working with higher hydration doughs or whole grain flours, you may need to adjust the timing accordingly. If things seem to be rising quickly, trust your instincts and feel free to remove it a tad earlier—happy baking is all about listening to your dough!
Troubleshooting Common Mistakes
Common Pitfalls When Proofing Bread
One common mistake is proofing in a too-cold environment. On the flip side, having the air fryer set too high can also result in a dense loaf. Overcrowding the air fryer is another issue; too many items can block proper airflow and disrupt even heating. Remember, yeast needs space to have a good time!
Resolving Sticky Dough Issues
If you find your dough is sticky post-proofing, fret not! This is often a sign of overly hydrated flour or insufficient kneading. Lightly dusting your hands and work surface with flour can help tame that stickiness without compromising the dough’s integrity. Just be cautious—using too much flour can affect the final texture of your bread. Instead, let the dough rest on a silicone mat, which is a fantastic option to minimize sticking.
Flavor Enhancements and Dough Variations
Customizing Your Bread Recipe
Feeling a bit adventurous? Infuse your dough with herbs or whole grains to create unique flavor profiles! Just keep in mind that such modifications might impact your proofing time. For example, mixing in whole wheat flour can often extend the rise time due to its denser nature.
Advanced Techniques for Bold Flavors
Take your bread to the next level by incorporating a sourdough starter. While this approach requires a bit more affection and patience, the depth of flavor you’ll achieve is absolutely worth the effort. Alternatively, tossing in chopped nuts or seeds not only enhances flavor but also introduces delightful texture. Feel free to adjust your proofing strategy to align with these exciting twists!
Baking Your Perfect Bread
Preheating for the Right Crust
Before you begin baking, preheating your air fryer is essential. A hot environment is what gives your bread that coveted crust it deserves. Set the fryer to the temperature appropriate based on your recipe—typically around 375°F (190°C)—and let it reach that perfect heat before introducing your dough.
Final Baking Recipe Templates
Bread Type
Temperature
White Bread
375°F (190°C)
Whole Wheat Bread
350°F (175°C)
Sourdough
400°F (204°C)
Baking Time
25-30 minutes
30-35 minutes
30-40 minutes
Adjustments in baking times may be necessary depending on the size of your dough. Armed with all these tips, you’re well on your way to mastering the craft of bread proofing in your trusty air fryer!

FAQs
How do I proof bread in an air fryer?
To proof bread in an air fryer, set the temperature to around 80°F (27°C) and place your dough inside. Allow it to proof for 30-40 minutes, or until it has doubled in size. The warm environment helps activate the yeast, creating fluffy, delightful bread.
What is the proof setting on an air fryer?
The proof setting on an air fryer is typically a lower temperature option, often around 80-100°F (27-38°C). This setting creates an optimal environment for yeast to rise in bread dough, ensuring it becomes airy and light.
Can I proof bread dough quickly in an air fryer?
Yes, using an air fryer can speed up the proofing process. Set it to a low temperature (80°F) to create a warm environment, allowing your dough to rise in about 30 minutes compared to more traditional methods.
What are the best air fryers for proofing bread?
Any air fryer with precise temperature control works well for proofing bread. Models that include a dedicated proofing setting are ideal, but even basic models can successfully proof dough if you keep a close eye on temperature and timing.
Can you cook bread dough in an air fryer?
Absolutely! Once proofed, simply shape your dough, place it in the air fryer basket, and cook at around 350°F (175°C) until golden brown, which usually takes 15-20 minutes. Indulge in your perfectly baked loaf!
Conclusion
Proofing bread dough in your air fryer unlocks a world of creative possibilities for home bakers eager to enhance their bread-making skills. By leveraging the right features—temperature control, adequate space, and a touch of humidity—you’re setting yourself up for culinary success. Remember, consistency in temperature and a bit of humidity are essential for happy yeast!
With the right model, like the Instant Vortex or Cosori, you can conquer any dough with confidence. Don’t shy away from experimenting with flavors, textures, and advanced techniques; each loaf presents an opportunity for artistic expression! So gather your ingredients, fire up that air fryer, and get ready to impress your family and friends. Happy baking, and always remember—delicious bread starts with patience and a pinch of love!
Pro Tip: Proof Bread Dough Perfectly in Your Air Fryer
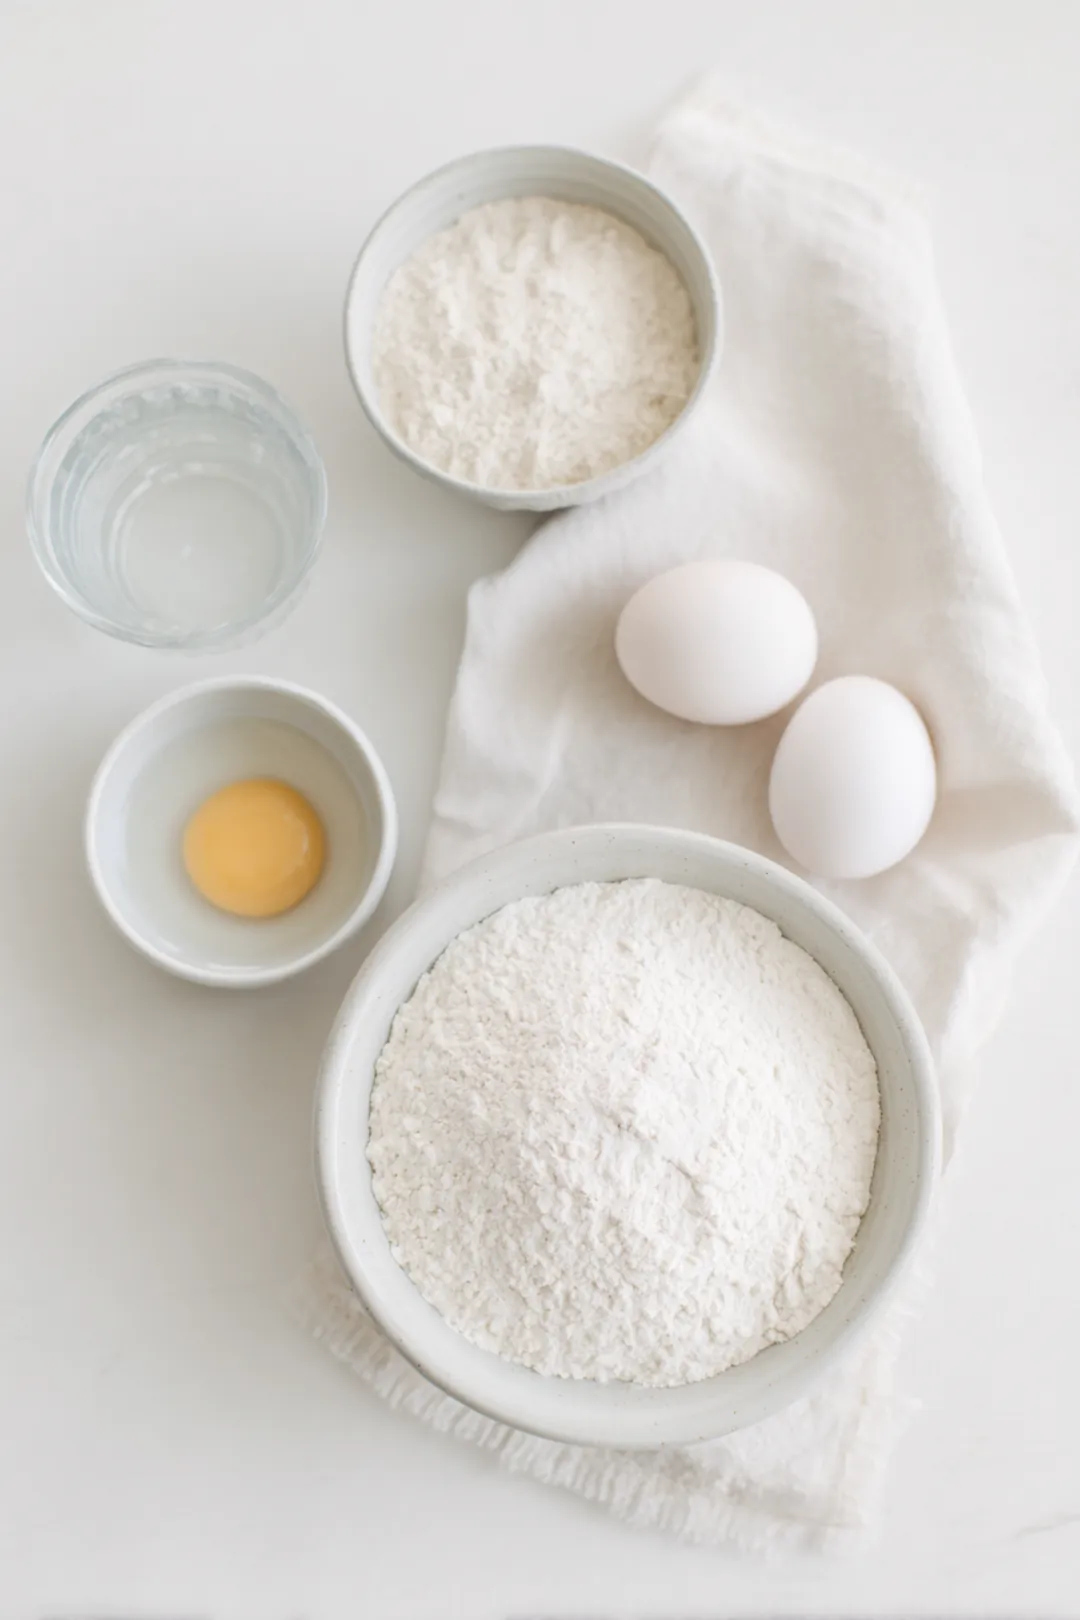
Ingredients
Method
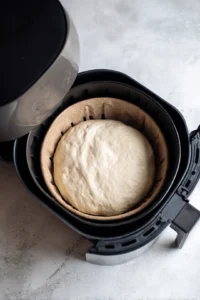
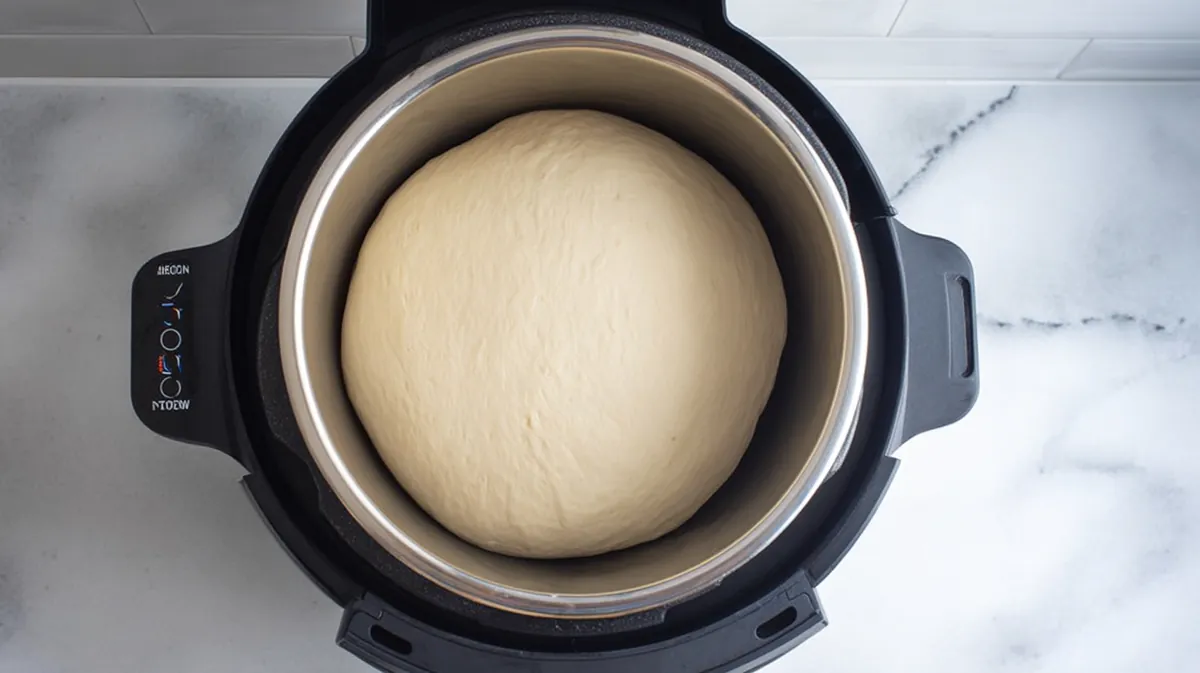
- Preheat your air fryer to a low temperature of around 80°F (27°C), making sure it’s set to proof mode if available.

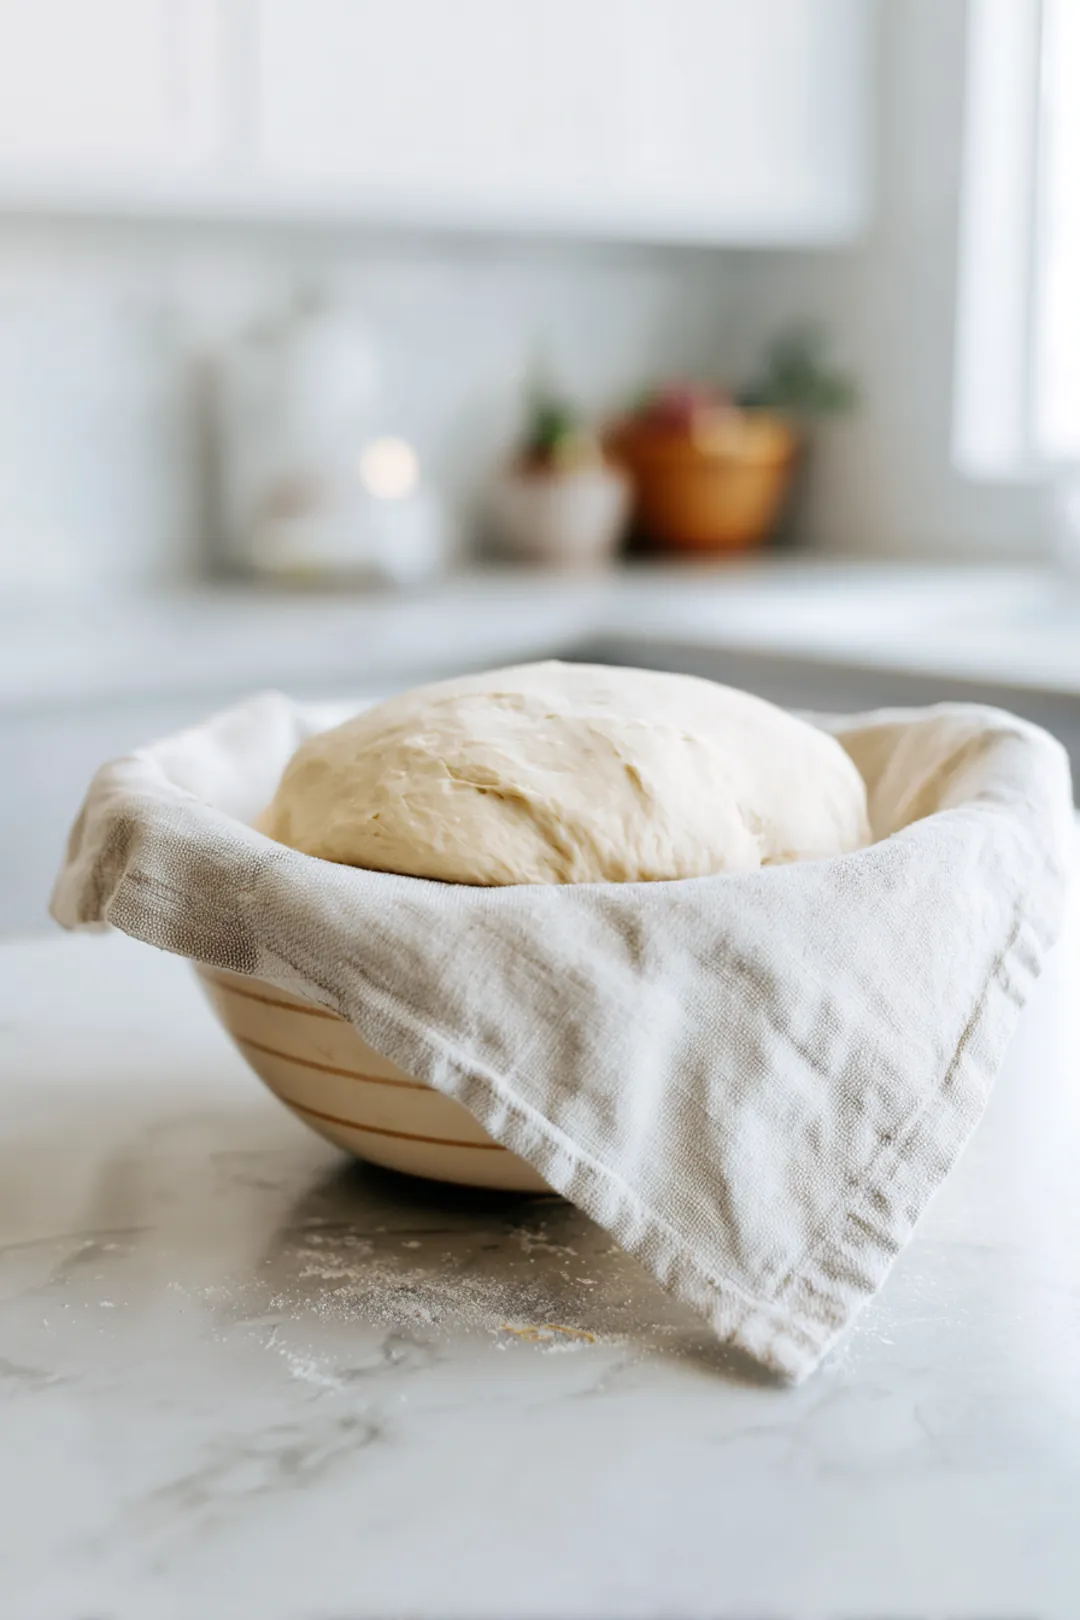
- Prepare your bread dough by placing it in a lightly greased bowl, covering it with a damp cloth or plastic wrap to retain moisture.
- Place the covered bowl in the air fryer and allow it to proof for about 30 minutes, checking periodically to ensure it’s rising as expected.