Delicious Air Fryer Honeycomb Pasta Recipe! 🍝✨
Ever tried transforming classic comfort food into a crunchy delight? Meet your new obsession: air fryer honeycomb pasta! 🍝✨ This dish promises to elevate your snacking experience while keeping things simple and delicious.
In this post, I’ll guide you through crafting perfectly crispy pasta that’s bursting with flavor. Get ready to master the art of air frying while discovering tips and tricks that will not only save you time but also impress your taste buds. Let’s dive into this culinary adventure together!
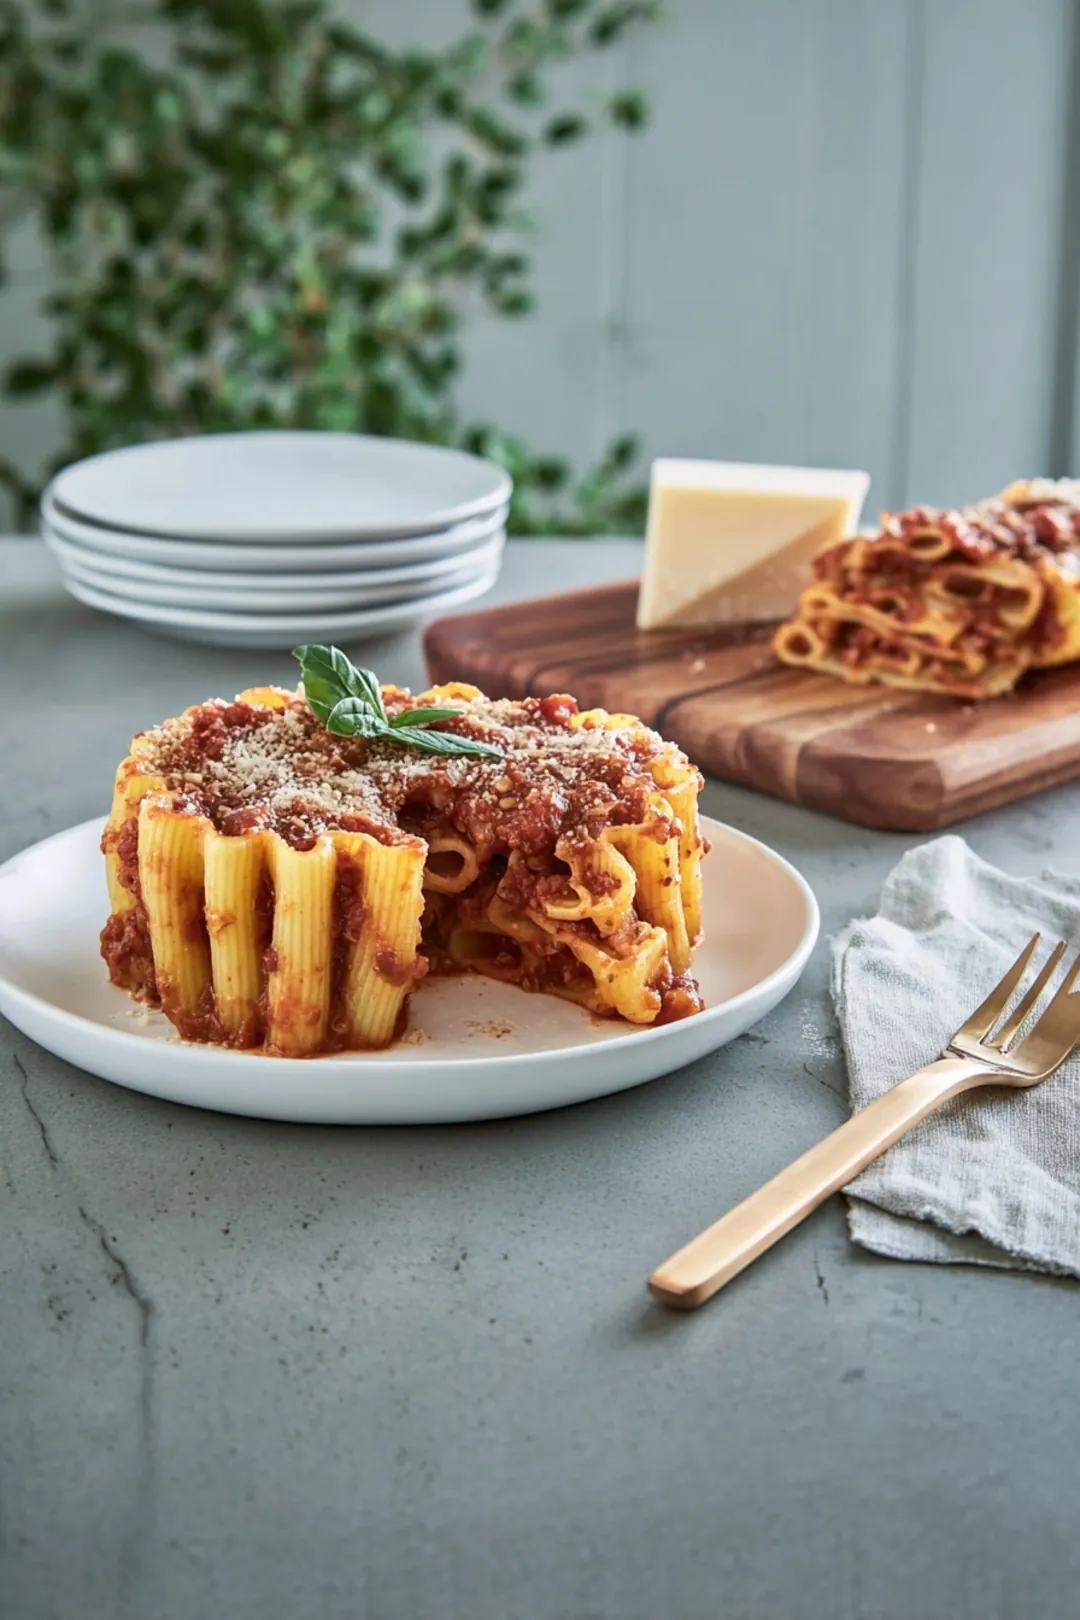
Table of Contents
Why You’ll Love This Recipe
- Perfect Pasta Texture: The secret to that irresistible crispy goodness lies in the hot air circulation of your air fryer. Ensure your pasta is al dente—firm to the bite—before it goes into the fryer; this prevents it from turning mushy when cooked.
- Crispy Coating: A light spray of olive oil on your honeycomb pasta is essential. This not only adds flavor but also promotes that golden, crunchy exterior we’re aiming for. A little olive oil can work wonders!
- Flavor Varieties: Don’t shy away from experimenting with sauces! A classic marinara or creamy Alfredo can elevate your dish to the next level. For something adventurous, drizzle on some pesto or try a spicy arrabbiata sauce for an added kick.
- Ingredient Swaps: Looking for a healthier option? Swap out regular pasta for whole wheat or gluten-free varieties. Just keep an eye on cooking times, as these options may differ slightly in how they cook.
- Avoid Overcrowding: It’s crucial to give your pasta space in the air fryer basket. Stacking them too high can lead to unevenly cooked pasta. For peak crispiness, aim for a single layer.
- Serve with Style: When it comes to presentation, the sky’s the limit! Consider topping your creation with fresh herbs, a sprinkle of parmesan, or a drizzle of chili oil for that restaurant-worthy finish.
- Leftover Magic: Got extra honeycomb pasta? Toss it into a fresh salad for lunch the next day or incorporate it into a fusion stir-fry. The culinary possibilities are endless!
Ready to elevate your snacking game? Let’s dive into the simple steps to create this delicious air fryer honeycomb pasta!
Ingredient Benefits
Let’s take a moment to appreciate the star players in our air fryer honeycomb pasta. One of the key ingredients here is olive oil. Not only does it add a layer of flavor to your dish, but it also offers some fantastic health benefits! According to Healthline, “Olive oil is rich in antioxidants and possesses anti-inflammatory properties, making it heart-healthy.” So, feel free to pour generously—your taste buds and your heart will thank you!
Cooking the Pasta
Perfecting Al Dente
To kick things off, cooking your honeycomb pasta correctly is fundamental. Follow the package instructions, ensuring you aim for that sweet spot—al dente. It’s all about that perfect texture! If you’re feeling adventurous and short on time, a pressure cooker can swiftly deliver that delightful chew we’re after.
“Be generous with your salt! It’s your pasta’s only chance to absorb flavor. Picture a well-seasoned sea when you salt your water.”
Olive Oil Toss
After draining your pasta, let it cool for a few minutes. This crucial step is key to preventing those unpleasant soggy bits later on. Once cooled, drizzle a light coating of olive oil and give your pasta a gentle toss to ensure every piece gets that glimmer. This little trick enhances flavor while setting you up for that golden, crispy texture.
“I often keep a clean kitchen towel handy to pat the pasta dry; it helps remove excess moisture that could lead to sogginess in the fryer.”
Air Frying Process
Preheat Your Air Fryer
Before diving into the actual frying, don’t skip the preheating step! Set your air fryer to 375°F (190°C). Preheating is like warming up your oven and ensures even cooking. Trust me—it makes a difference!
Timing is Everything
Now it’s time to transfer that glorious pasta into the air fryer basket. Cook for 12-15 minutes, but keep your eyes peeled! You want that beautiful golden brown and bubbly cheese.
“Give the basket a little shake during cooking; not only does this promote even crispiness, but it also gives that ‘I know what I’m doing’ chef vibe!”
Customization Ideas
Sauce Pairing Inspirations
Embrace versatility with sauces! From the comforting embrace of classic marinara to the zesty kick of a homemade pesto, there’s a world of flavor out there waiting for you!
- How about a quick sauté of garlic, crushed tomatoes, and a sprinkle of fresh herbs? It’s fresh, vibrant, and can be whipped up in mere minutes!
Dietary Options
If you’re hosting guests with varied dietary preferences, don’t hesitate to switch things up! Use gluten-free pasta for a sensitive palate, or indulge plant-based eaters with vegan cheese or creamy cashew alternatives. It’s all about inclusivity! Additionally, consider serving with Air fryer oatmeal cookies with 2 ingredients for a sweet finish to your meal!
Serving and Storing
Elevate Presentation
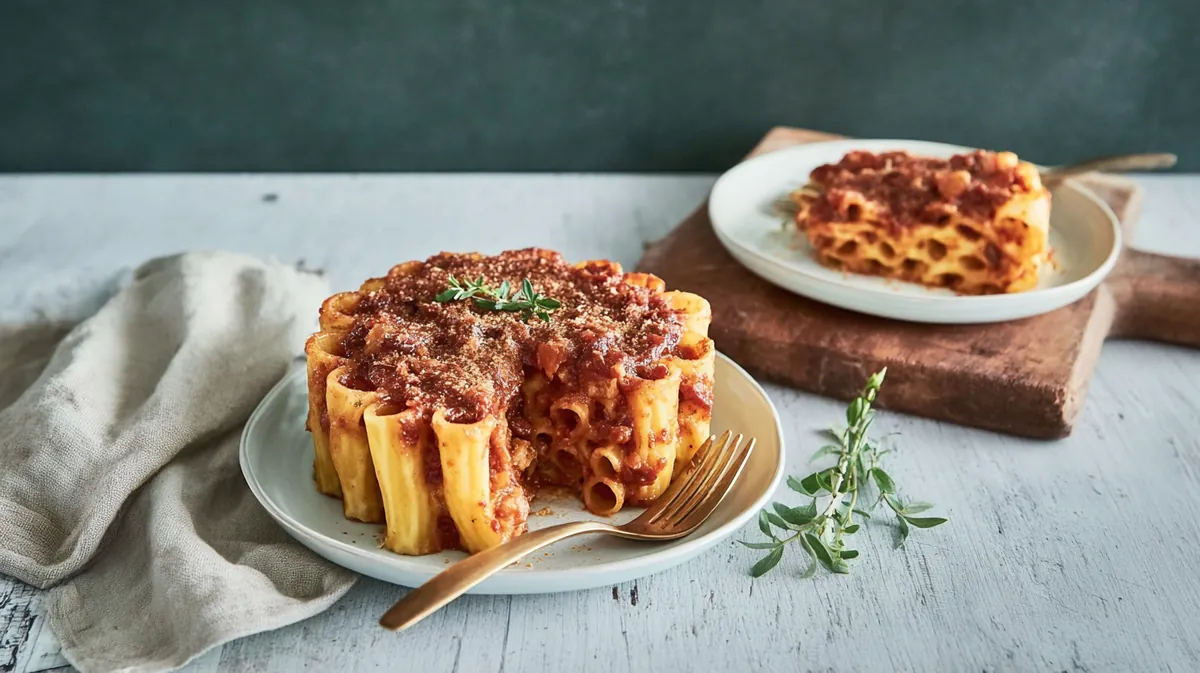
Serving your air fryer honeycomb pasta is where creativity shines. A simple garnish can take your dish from ordinary to extraordinary! Fresh herbs scattered on top create a vibrant look with added flavor. Present them in colorful bowls for that eye-catching appeal—it’s perfect for sharing on social media!
Smart Leftover Suggestions
If you’ve got leftovers, don’t worry! Store your pasta in an airtight container in the fridge, where it’ll keep for about 3 days. For a fun twist, transform them into a salad with crunchy veggies and a zesty dressing. You’ll be amazed at how great it tastes fresh again! You might even want to add some Air fryer bean & cheese taquitos for a tasty side.
Troubleshooting Common Issues
Steer Clear of Mistakes
To navigate the occasional hiccups in your cooking journey, remember: soggy pasta is a no-go. Always let it cool, and don’t overcrowd your air fryer. Give those pasta pieces some breathing room for optimal crunch!
Chef Mason’s Pro Tips
Flavor Enhancements
Looking to amp up your dish’s flavor? Fresh herbs like oregano and thyme are fantastic additions. Don’t hesitate to play around with spices, too; cooking should be fun and experimental! You can also try making Air fryer toast with leftover gravy for a unique flavor combination.
Embrace Experimentation
The kitchen is your playground! Try different flavor profiles or host a friendly taste test to discover your favorites and unleash your creativity. You might find that pairing your pasta with Air fryer spam musubi bites adds a delightful twist!
FAQs
Can you cook pasta in an air fryer?
Yes, indeed! The air fryer is a fabulous tool for achieving that crispy outside while keeping the inside delightfully tender.
Best temperature for air frying?
A consistent 375°F (190°C) will bring out the best colors and flavors in your dish.
Cooking times for different shapes?
For honeycomb pasta, 12-15 minutes is your baseline. Just adjust cooking times based on the pasta shape you’re using.
Conclusion
Making delicious air fryer honeycomb pasta is a journey filled with flavor and crispy textures! Remember the importance of perfectly al dente pasta, the magic of olive oil, and the joy of preheating your air fryer for that irresistible golden crunch. Feel free to play with sauces and toppings to cater to your guests’ tastes, and don’t shy away from experimenting with flavors and dietary options. If you end up with leftovers, transform them into a vibrant pasta salad for a fresh twist. Cooking should evoke creativity and passion, so embrace the adventure and have fun with it! Happy air frying, and may your dishes always be crispy and full of love. 🍝✨
Delicious Air Fryer Honeycomb Pasta Recipe! 🍝✨
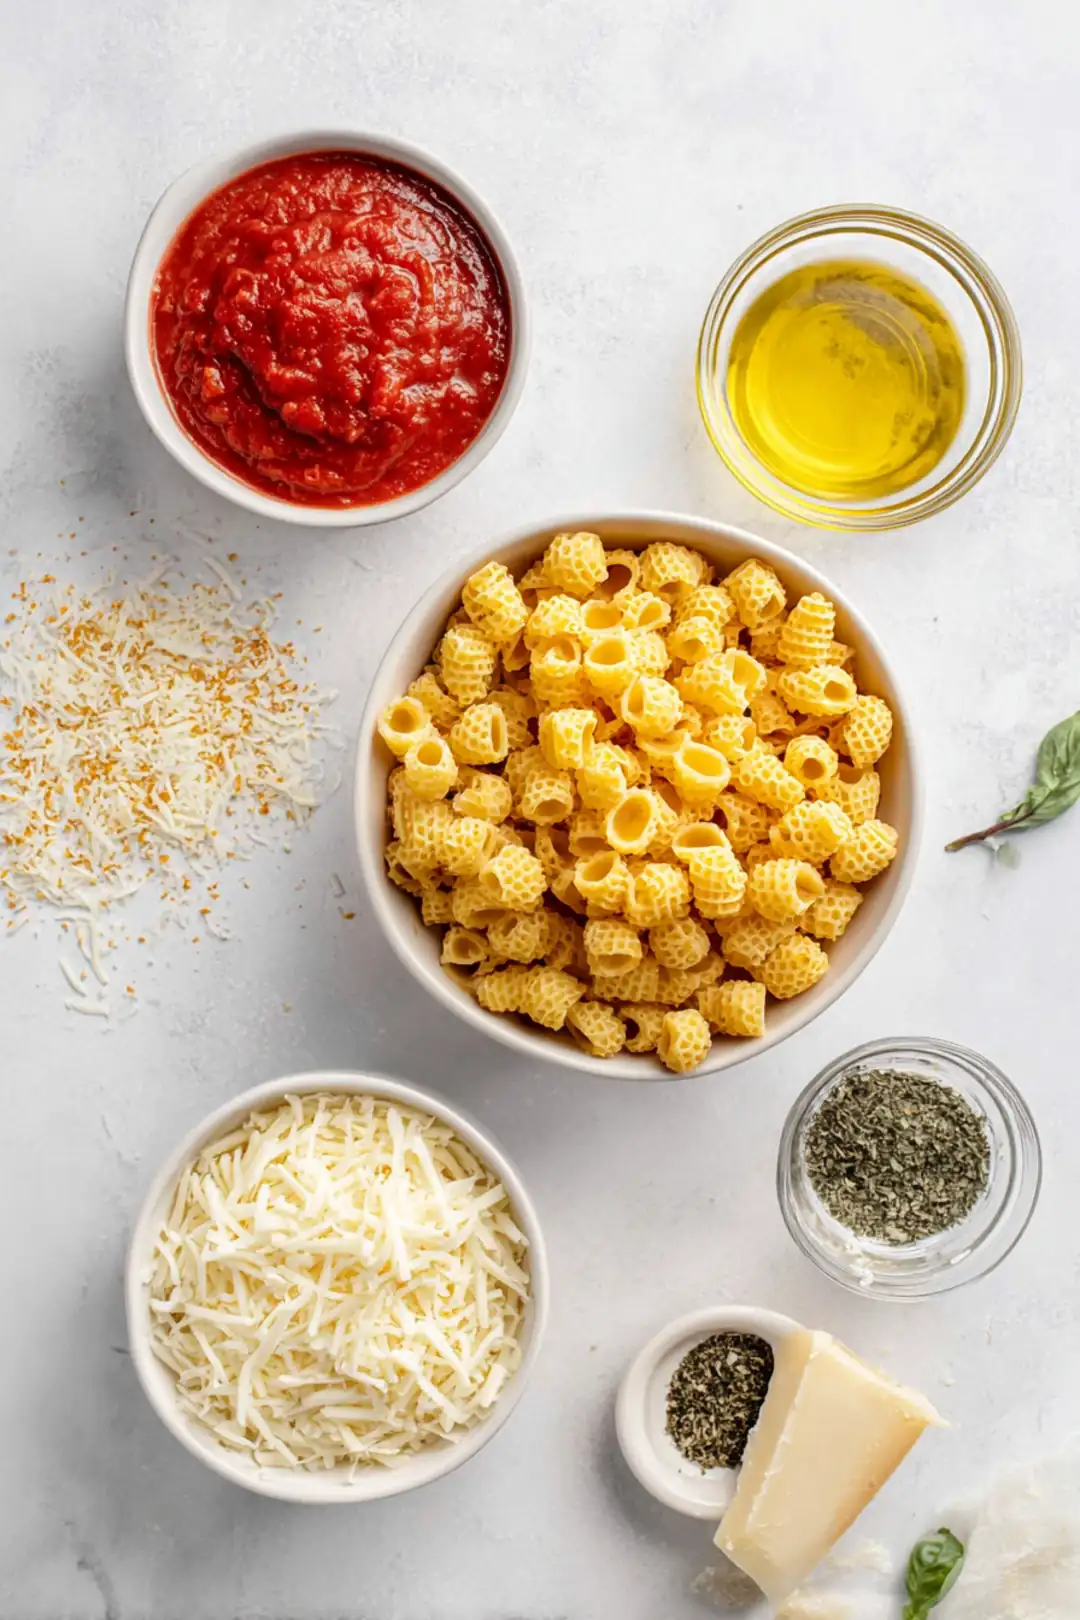
Ingredients
Method
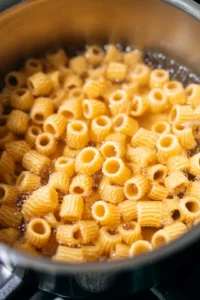
- Begin by boiling the honeycomb pasta in salted water according to package instructions until al dente. Drain and set aside.
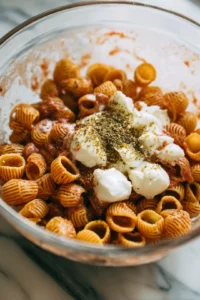
- In a mixing bowl, combine the cooked pasta with olive oil, marinara sauce, mozzarella cheese, and dried basil. Mix well until all ingredients are evenly coated.
- Transfer the pasta mixture into the air fryer basket and cook at 375°F (190°C) for 12-15 minutes, or until the cheese is bubbly and slightly golden. Let it rest for a few minutes before serving.