Delicious Air Fryer Cheesy Breadsticks for Fun Lunchboxes
Who said lunchboxes have to be boring? Imagine sending your little ones off with a treat that’s cheesy, crispy, and guilt-free—all thanks to your trusty air fryer!
In this post, I’ll show you how to whip up scrumptious air fryer cheesy breadsticks that will transform any meal into a delightful experience. From customizing flavors to preparing ahead for those jam-packed mornings, you’ll discover practical tips that make these cheesy wonders an essential addition to lunchboxes. Let’s dive into the deliciousness!
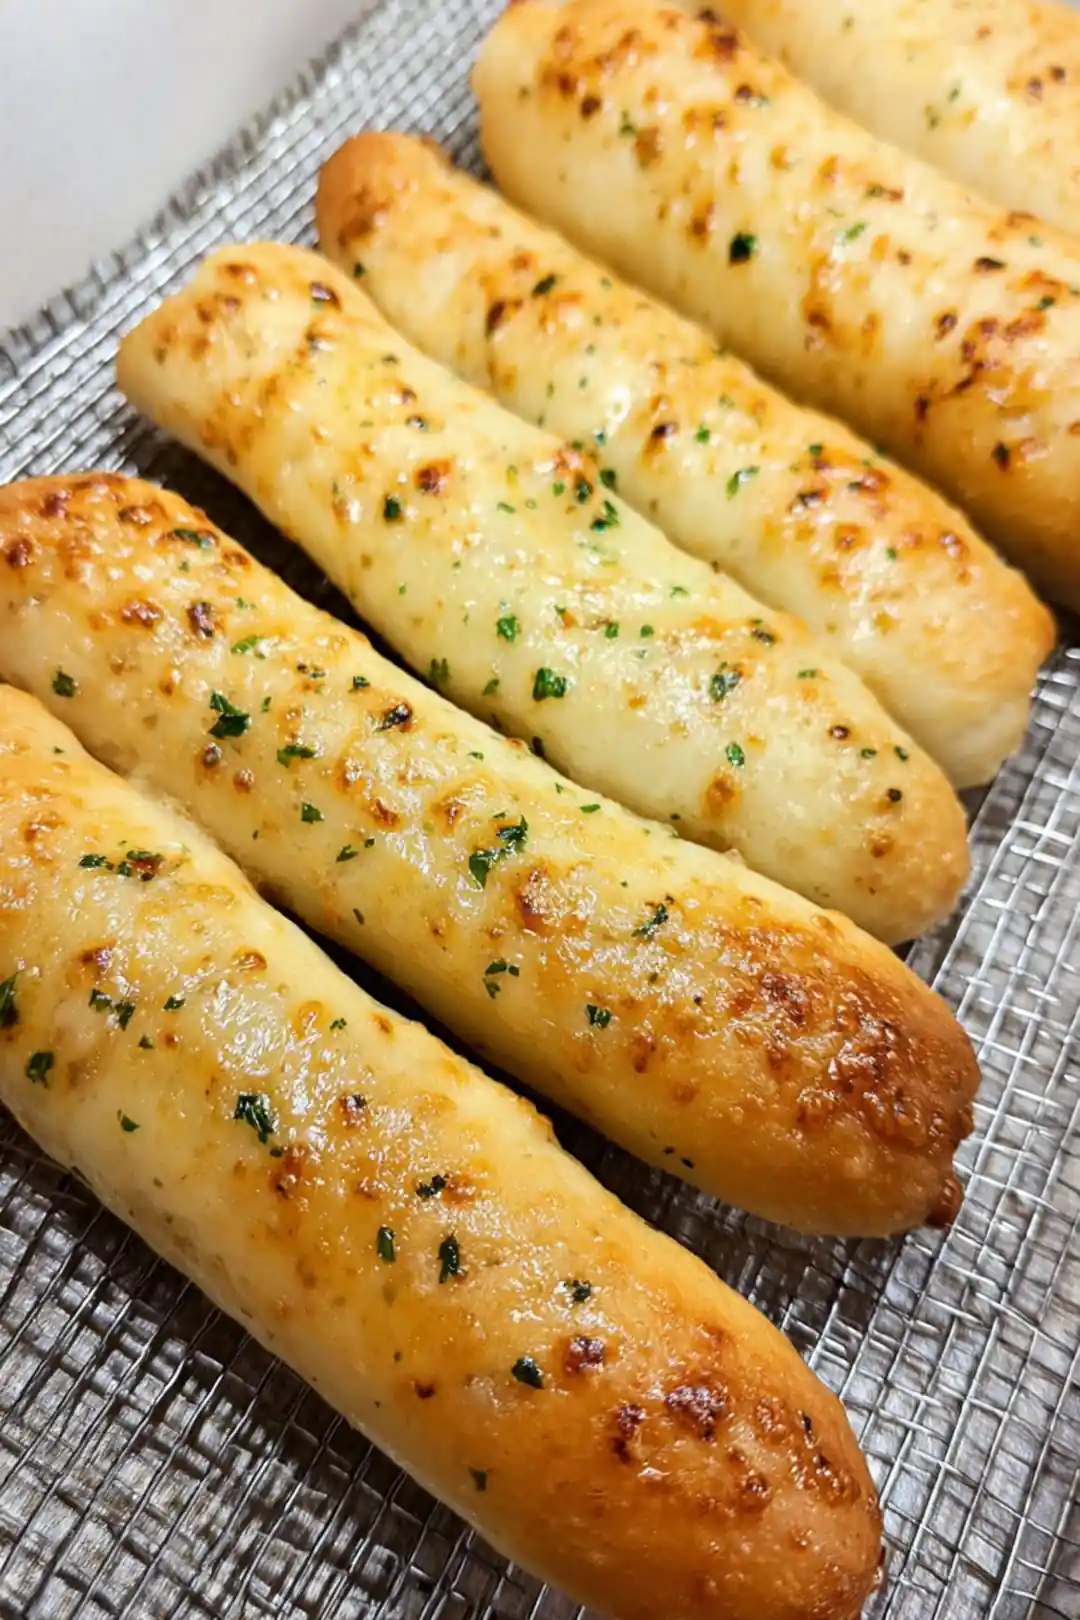
Table of Contents
Why You’ll Love This Recipe
These air fryer cheesy breadsticks are not just a treat; they’re a game-changer for lunchboxes, guaranteed to add a smile to any mid-day meal. With a few simple chef-driven insights, you’ll turn these delightful sticks into a staple that’s quick, clever, and endlessly practical.
- Nutritional Twist: Using an air fryer means you can indulge without the guilt! These cheesy breadsticks have less fat than their fried counterparts, making them a healthier snack option for your little ones. What’s better than knowing you’re sending them off with something not just delicious, but nutritious too?
- Gluten-Free Goodness: Need to cater to gluten sensitivities? Swap out the regular flour for a gluten-free mix, and watch your kids savor the same cheesy delight without compromise!
- Cheese Choices: While I adore mozzarella, feel free to experiment with different cheeses. Sharp cheddar or pepper jack can add a delightful kick that makes lunchtime even more exciting!
- Herbs and Spices: Don’t hesitate to sprinkle in herbs like oregano and basil for that authentic breadstick flair. A dash of garlic powder can do wonders for depth of flavor!
- Dipping Delight: Pair these breadsticks with marinara for a classic combo, but don’t stop there! A creamy ranch, zesty pesto, or even a spicy yogurt dip can make snack time a little more fun and creative. For a delightful variation, try some air fryer mini corn dogs for kids alongside these cheesy treats.
- Prepping Ahead: Make a batch and freeze extras! You can pop them in the air fryer straight from the freezer for a quick lunch option on busy days. Trust me; your future self will thank you for this simple meal prep hack!
- Watch the Crunch: Keep an eye on them toward the end of the cooking time. Air fryers can vary, and a quick check ensures you don’t lose that perfect golden crust.
Now, let’s dive into the simple steps to whip up these cheesy wonders!
Guilt-Free Indulgence
There’s something so wonderful about cheesy breadsticks—especially when you know you’re making a healthier choice! Using an air fryer provides that delightful crunch we all crave while cutting down on fat significantly. In fact, air frying uses up to 75% less fat than traditional deep frying (USDA). This is a glorious twist for lunchboxes, as you can offer your kids a tasty treat without worrying about excess oil. They’ll be satisfied and happy to munch on these cheesy delights, and you can feel good about packing them!
Versatile and Customizable
One of the joys of cooking is making a recipe your own! This cheesy breadstick recipe serves as a perfect canvas for creativity, especially when catering to different dietary needs. For those who require a gluten-free option, swapping in a gluten-free flour blend is a simple fix. To ensure the dough maintains its lovely consistency, start with a blend that contains xanthan gum, which helps the breadsticks rise beautifully.
Cheese lovers rejoice! You can easily switch things up with sharp cheddar, pepper jack, or even a melty mozzarella. Each option offers a unique flavor profile that can cater to every taste preference in your household.
Flavor Enhancements
Now, let’s talk about elevating those breadsticks! The right herbs and spices can truly transform your dish. A sprinkle of garlic powder or a dash of Italian seasoning adds warmth and depth to every bite. If you’re feeling adventurous, consider adding crushed red pepper flakes for a spicy kick or fresh herbs like rosemary or basil for that irresistible garden-fresh flavor.
In my kitchen, I often mix in a bit of smoked paprika for an unexpectedly delightful twist! Remember, not only do these additions make your breadsticks taste fabulous, but they also pack in some nutritional value.
“Garlic, in particular, has been associated with improved immune function and heart health.”
Healthline
Fun for Dipping
What’s a breadstick without a delicious dip? Creativity is the name of the game here! Classic marinara sauce is a must—it’s like a matching sweater to a great outfit! But don’t stop there; you can mix it up with ranch dressing for the kids who can’t resist a creamy dip or pesto for a fresh, herby accent. I love to play with dips in my kitchen; sometimes, I whip up a yogurt-based dip with lemon and dill for a refreshing surprise.
When packing them for lunch, arrange the breadsticks beautifully alongside the sauces. Kids eat with their eyes first, and this little presentation trick can make them even more excited about their meal! Pair these with some air fryer apple chips with cinnamon for a fun and flavorful lunchbox!
Ingredients You’ll Need
Essential Ingredients
For our cheesy breadsticks, you’ll need these core ingredients to ensure that perfect cheesy goodness:
- All-purpose flour (or gluten-free blend)
- Yeast (to make those sticks rise)
- Warm water (yep, trust me on this one!)
- Grated cheese (sharp cheddar and mozzarella are fantastic picks)
- Olive oil (a touch goes a long way)
Quality matters! Always choose good cheese and fresh yeast, as they significantly impact flavor and texture in your breadsticks.

Optional Add-Ins
Looking to spice things up? Why not consider sun-dried tomatoes for a touch of sweetness and color or some jalapeños for a bit of heat? It’s thrilling to play with different add-ins to surprise your palate! I’ve even tried mixing in some walnuts for a nutty crunch that pairs beautifully with the cheese.
Pantry Staples
In any kitchen, certain staples should always be at the ready. Keep baking powder, salt, and a selection of oils in your pantry. These essentials open up the door for similar recipes and can make last-minute meals a breeze.
Step-by-Step Recipe Instructions
Preparing the Dough
Let’s roll up those sleeves! Begin by mixing your dry ingredients—flour, yeast, and salt—together. It’s critical to ensure those elements are combined well before adding your warm water and olive oil. Mix until the dough pulls together.
Kneading is the next step: you’ll want to knead for about 5-7 minutes until it’s smooth and elastic. Pro tip: if the dough is too sticky, gradually add a dusting of flour! I often let it rest for a few minutes after kneading; that’s when the gluten develops beautifully.

Shaping the Breadsticks
Once your dough has risen, it’s time to shape! Divide it into equal pieces, about the size of your finger. You can keep them thick and fluffy or roll them out thinner for a crisper finish. Just remember, thinner shapes will cook faster, so make sure to adjust your timing accordingly!
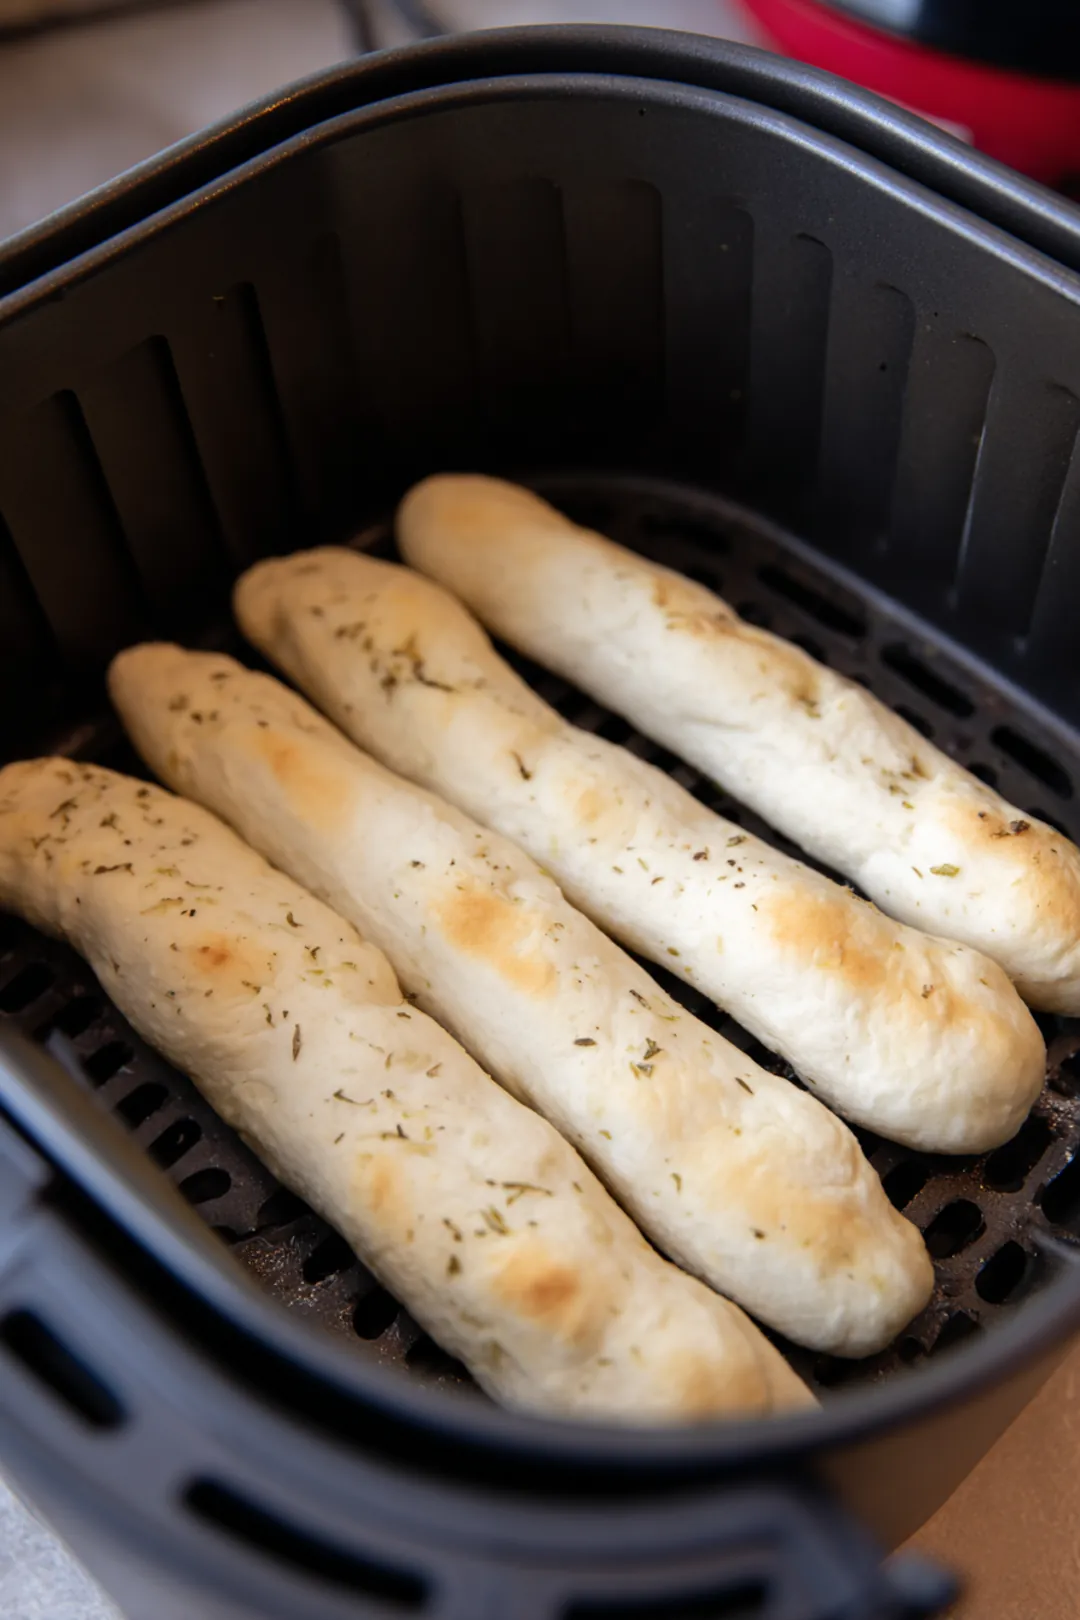
Air Frying Tips
For perfect breadsticks, preheat your air fryer to 390°F (200°C) and cook for about 8-10 minutes. Keep an eye on them; every air fryer behaves a bit differently, and you want that golden brown color to come through! A common mistake is overcrowding the basket—if you do this, you’ll end up with unevenly cooked breadsticks.
Prepping Ahead
Freezing Tips
Made a batch too big? No worries! Cooked breadsticks can be frozen for later enjoyment—simply let them cool completely, then wrap them tightly in foil and place them in a freezer bag. This way, you’ll have cheesy delights on hand whenever the craving strikes!
Reheating Instructions
When you’re ready to enjoy those frozen beauties, pop them back into the air fryer at 350°F (175°C) for about 4-6 minutes. This method restores that delightful crunch reminiscent of when they were freshly made.
Packing in Lunchboxes
Make lunchtime fun by packing a balanced meal! Pair those cheesy breadsticks with veggie sticks for crunch and fresh fruit to round things out. Kids love variety, and this way, they’ll have something fun to dive into, making lunchtime an exciting experience. You might even add some healthy air fryer chicken fries for toddlers for a protein boost!
Making It Your Own
Flavor Customizations
Don’t hesitate to experiment! Change up your herbs or try using smoked gouda instead of traditional cheese. The beauty of cooking lies in your ability to adapt it all to the unique taste buds in your family.
Dietary Options
For those looking to keep it plant-based, vegan cheese can easily replace traditional products. There are numerous options available that melt beautifully without sacrificing flavor.
Cooking Tests
Lastly, allow yourself some freedom to experiment with sauces not typically paired with breadsticks. A tangy buffalo sauce or even a sweet chili sauce can create some unexpected flavor pairings that your family might just love! Share your experiences, and let’s keep the community buzzing with flavor!
Nutrition Information
Nutritional Benefits Overview
These cheesy breadsticks are more than just a treat; they offer a solid serving of protein and calcium, both essential for growing kids. Plus, they can be made with whole grains or added veggies, giving them a nutritional boost and fueling active bodies!
Reference to Authoritative Sources
Don’t forget to refer to trusted sources like the USDA or Mayo Clinic for accurate nutritional information. This helps you provide readers with factual data and empowers them to make informed choices for their families!
FAQs
How long should cheese sticks go in the air fryer?
For optimal results, aim for 8-10 minutes at 390°F, but always check for that perfect golden finish!
What to make in an air fryer for lunch?
Some quick meal ideas include air-fried chicken strips, crispy veggies, or even mini pizzas—perfect for satisfying those midday cravings!
How to heat up breadsticks in an air fryer?
To reheat your breadsticks, set your air fryer to 350°F (175°C) and cook for about 4-6 minutes to enjoy that irresistible crunch once more!
Tips for air fryer performance and variations in cook time by brand?
Every air fryer can be a tad different, so it’s best to start checking your food a couple of minutes early. Remember that smaller or larger models may require slight adjustments in cooking time.
Conclusion
Creating these air fryer cheesy breadsticks isn’t just about whipping up a quick bite; it’s about crafting meals that are enjoyable, nourishing, and fun for the whole family. With the ability to customize and cater to diverse needs, you can genuinely make this recipe your own. Remember that herbs and dipping sauces can elevate the experience, transforming a simple staple into a culinary adventure.
So, pack those lunchboxes with creativity and a sprinkle of love, knowing that you’ve found a guilt-free indulgence everyone will cherish. Keep experimenting, and don’t shy away from bold flavor leaps—there’s nothing quite like the magic of home-cooked comfort

Delicious Air Fryer Cheesy Breadsticks for Fun Lunchboxes
Ingredients
Method
- In a large bowl, mix the flour, yeast, and salt. Gradually add the warm water, stirring until the dough forms. Knead the dough for about 5 minutes until smooth.
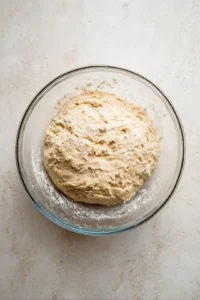
- Cover the dough with a kitchen towel and let it rise in a warm place for approximately 30 minutes, until it doubles in size.

- Preheat the air fryer to 350°F (175°C). Roll out the risen dough and cut it into sticks. Place the breadsticks in the air fryer basket, brush with olive oil, sprinkle with Italian seasoning, and top with cheese. Air fry for 8 minutes until golden brown and crispy.